PROXIMANOVA-LIGHT.OTF PROXIMANOVA-LIGHTIT.OTF PROXIMANOVA-EXTRABLD.OTF PROXIMANOVA-BOLD.OTFPROXIMANOVA-BLACK.OTF
Get this font in here!
This Article Applies to:
- Avast Business Hub
To better provide our customers and partners with all of the tools necessary to manage their devices, Avast has created a multi-tenant cloud-based console to upgrade the Avast Business Cloud Console. This gives administrators and partners a simple overview of all customers and the status of their devices.
The normal Hub allows users to create Sites, but if a Partner registers for the Hub via the Partner Portal, their console will use "Customers" instead of "Sites". These terms will be used more or less interchangeably in the documentation.
Single- vs. Multi-Tenant Console
It is no longer possible to register a multi-tenant console directly during the registration, unless you have a special link provided by sales or have registered via the Avast Partner Portal. The conversion to multi-tenant is now done post-registration, via the Company profile page of the Hub.
Small and medium businesses are likely only managing their own devices and will only need one account. This option will set up a single-tenant account in the Hub, and there will not be any partner-level options like the customer drop-down menu.
Larger businesses and partners tend to manage multiple smaller companies (or sites). A multi-tenant account in the Hub enables you to create multiple customers/sites from the same top-level account. You can add administrators to a single company, who will only have access to the single-tenant version.
If you are a partner, you will need to sign up for the Hub from the Partner Portal to receive the Partner version of the multi-tenant console.
Feature Overview
The Hub provides new and additional features to many previous Cloud Console options.
 Support Options
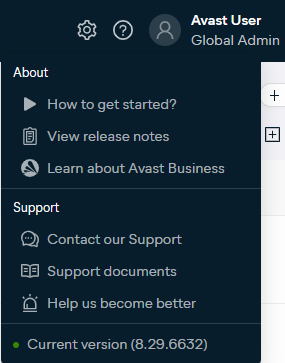
The question mark in the top right of the Hub, beside your account name, contains the following information to help support you if needed:
How to get started?: Displays "getting started" tutorial videos on YouTube
View release notes: Provides the release notes for the latest version of the Business Hub
Learn about Avast Business: Provides links to the product development roadmap, legal documents, blog, forum, and details about the console
Contact our Support: Allows you to submit a technical support ticket directly from the Console, and provides phone numbers if you would prefer to call our Business Technical Support representatives
Support documents: Provides links to the Knowledge Base
Help us become better: Allows you to vote for and submit new ideas for console features
Version number: Displays the current version number for the Hub, which you can click to view the Hub Status Page
The Partner Hub also includes a link to the Partner Portal in this section.
Integrations
In preparation for future integrations between third-party services our customers use and the Hub, the Integrations section has been added. Access it by clicking the cog at the top right, then Integrations.
Avast has finalized integration with ConnectWise Automate. For more information, see Integrating Business Hub With ConnectWise Automate.
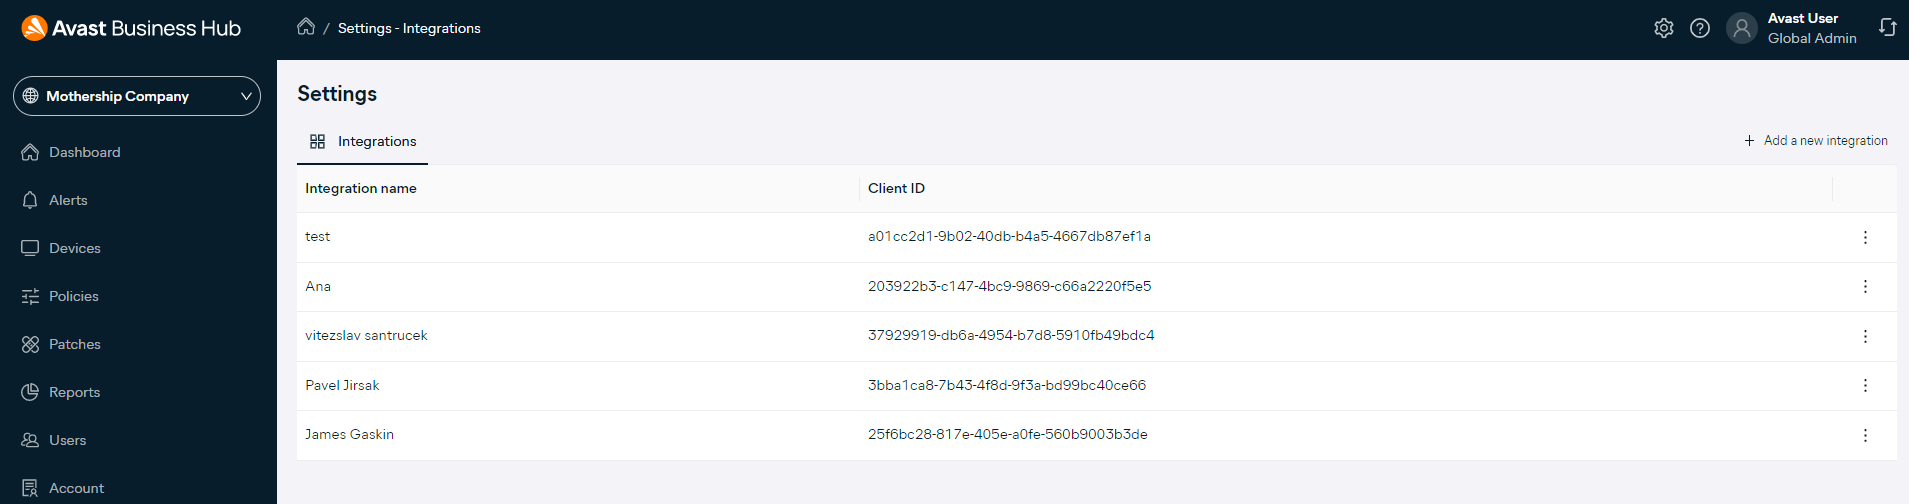
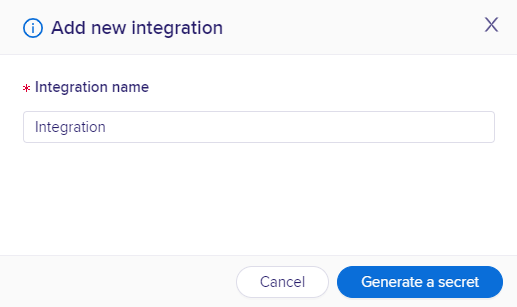
- Click + Add a new integration
- Enter a name for the integration
- Click Generate Secret
- Copy the Client ID and Client Secret into your configuration
- Once you close this screen, you will not be able to view the secret again. If you need a new secret, click the three dots beside the integration on the list, click Generate New Secret, then add this to your configuration.
 Customer/Site Selection
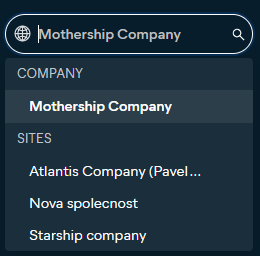
On the left-hand navigation pane, you can select any of the sites/customers in the drop-down list to be provided more specific details for that site/customer. You will also see links to their single-company console. All company-level tabs will also populate with the customer's information.
Dashboard
Top-level
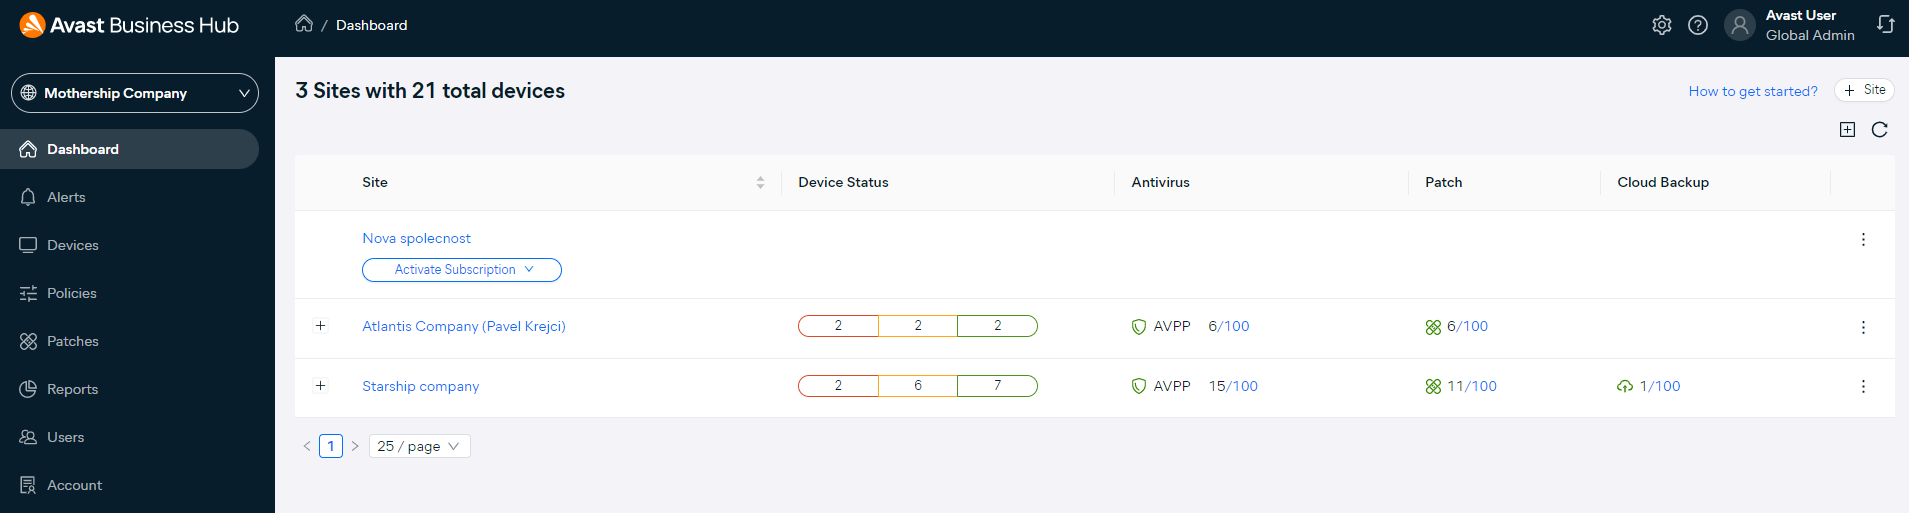
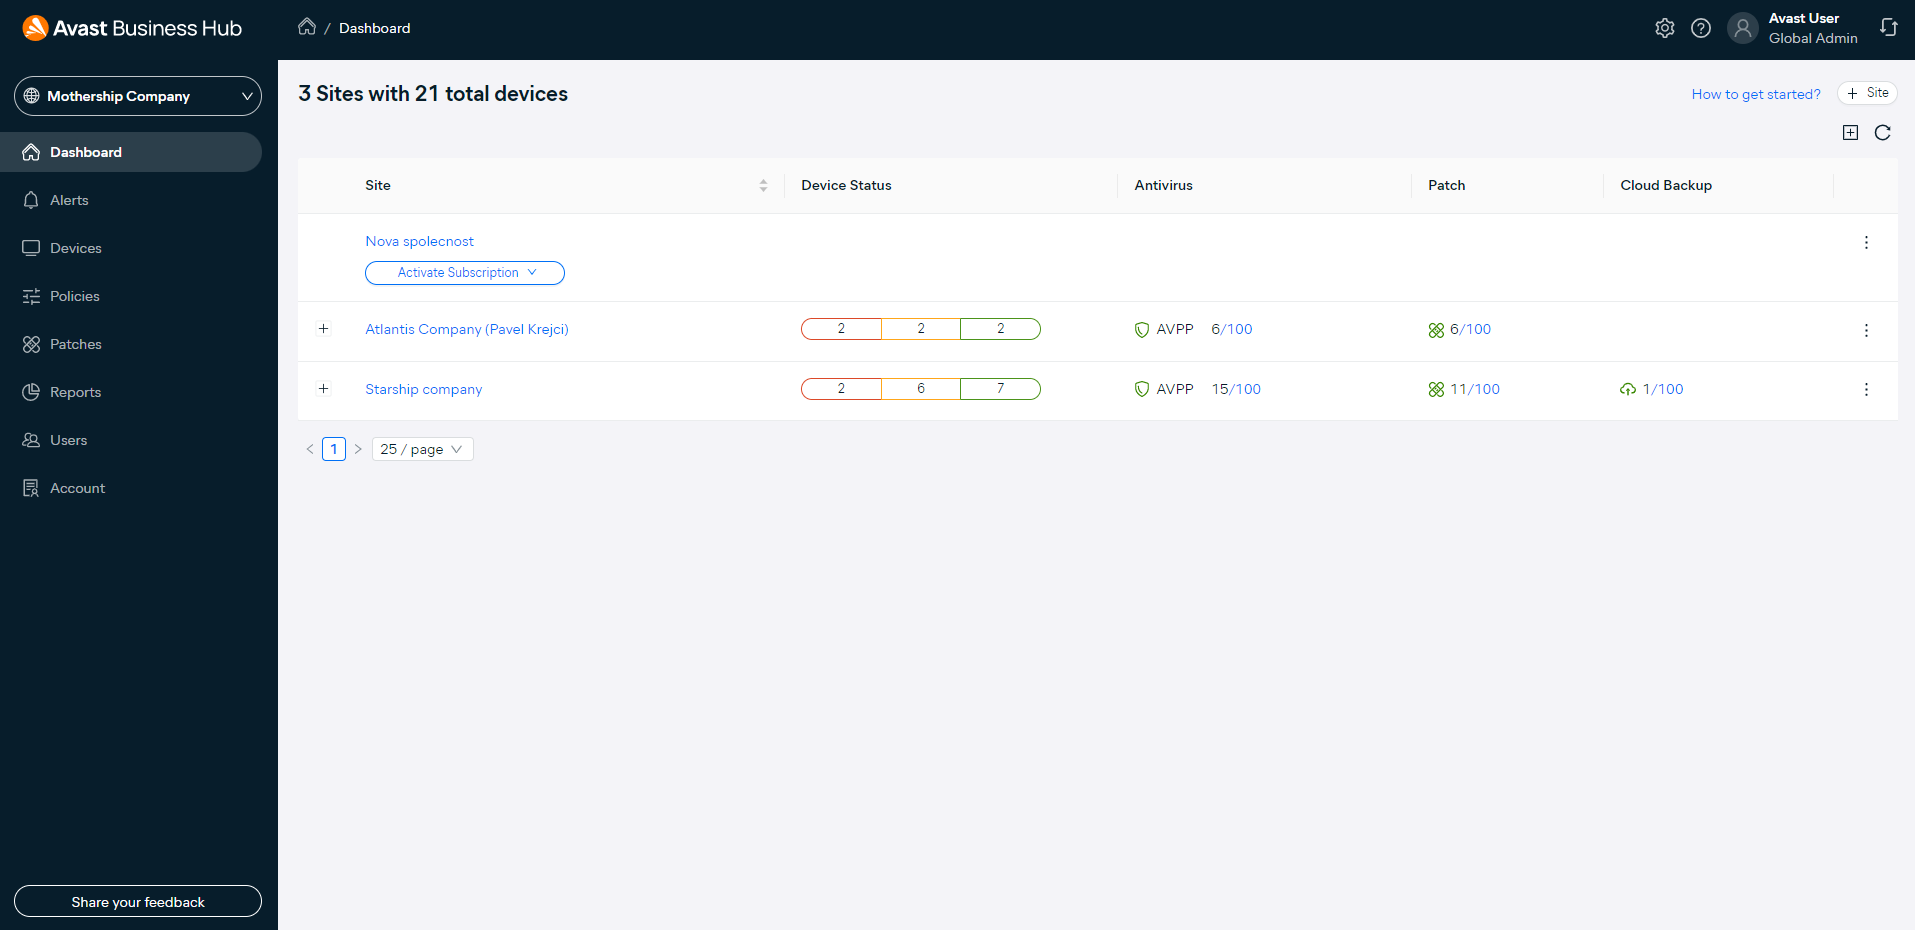
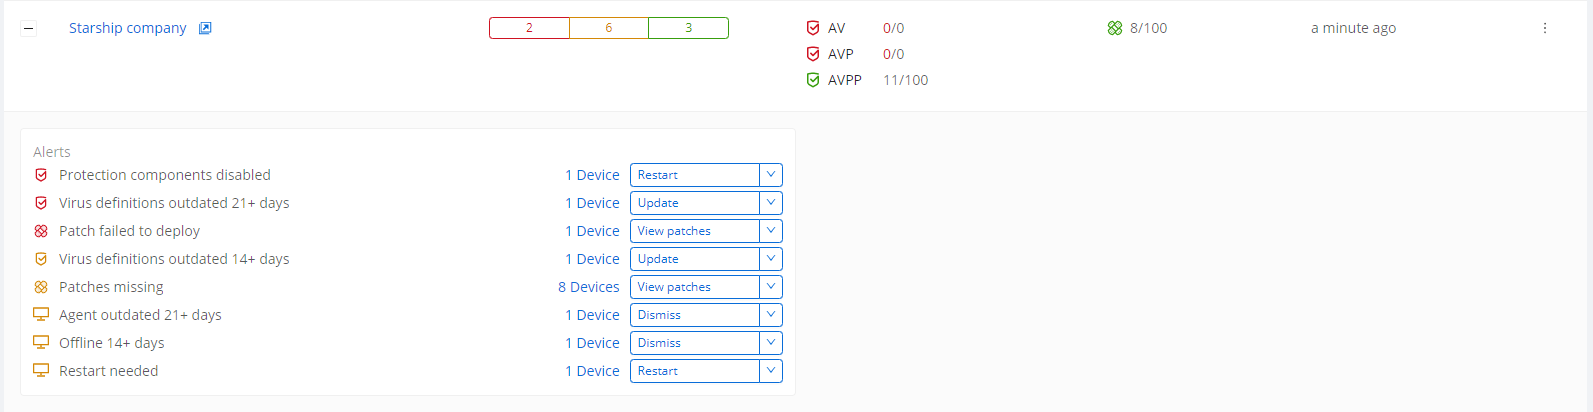
The top-level Dashboard displays an overview of all managed sites/customers along with their device statuses (safe, vulnerable, in danger), and in use/available subscriptions. Clicking the plus sign allows you to view and resolve, if required, any alerts on the sites'/customers' devices. For more information, see Managing Alerts.
You can also click on the three dots to the right of a site's/customer's name date to view more options:
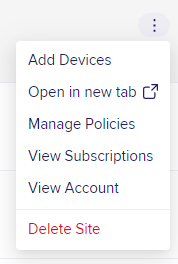
Add Devices: Opens the options to create an installation file or send an email link to add new devices to the site's/company's Hub
Open in new tab: Opens the site's/company's Hub as a single-company version in a new tab
Manage Policies: Opens the site's/company's Policies page, allowing you to manage their Policies
View Subscriptions: Opens the site's/company's Subscriptions page, allowing you to view and manage their Subscriptions
View Account: Opens the Company/Site profile tab for the selected customer/site within the Hub
Delete Customer/Site: Deletes the customer's/site's account and removes all devices and account data
Customer-Level
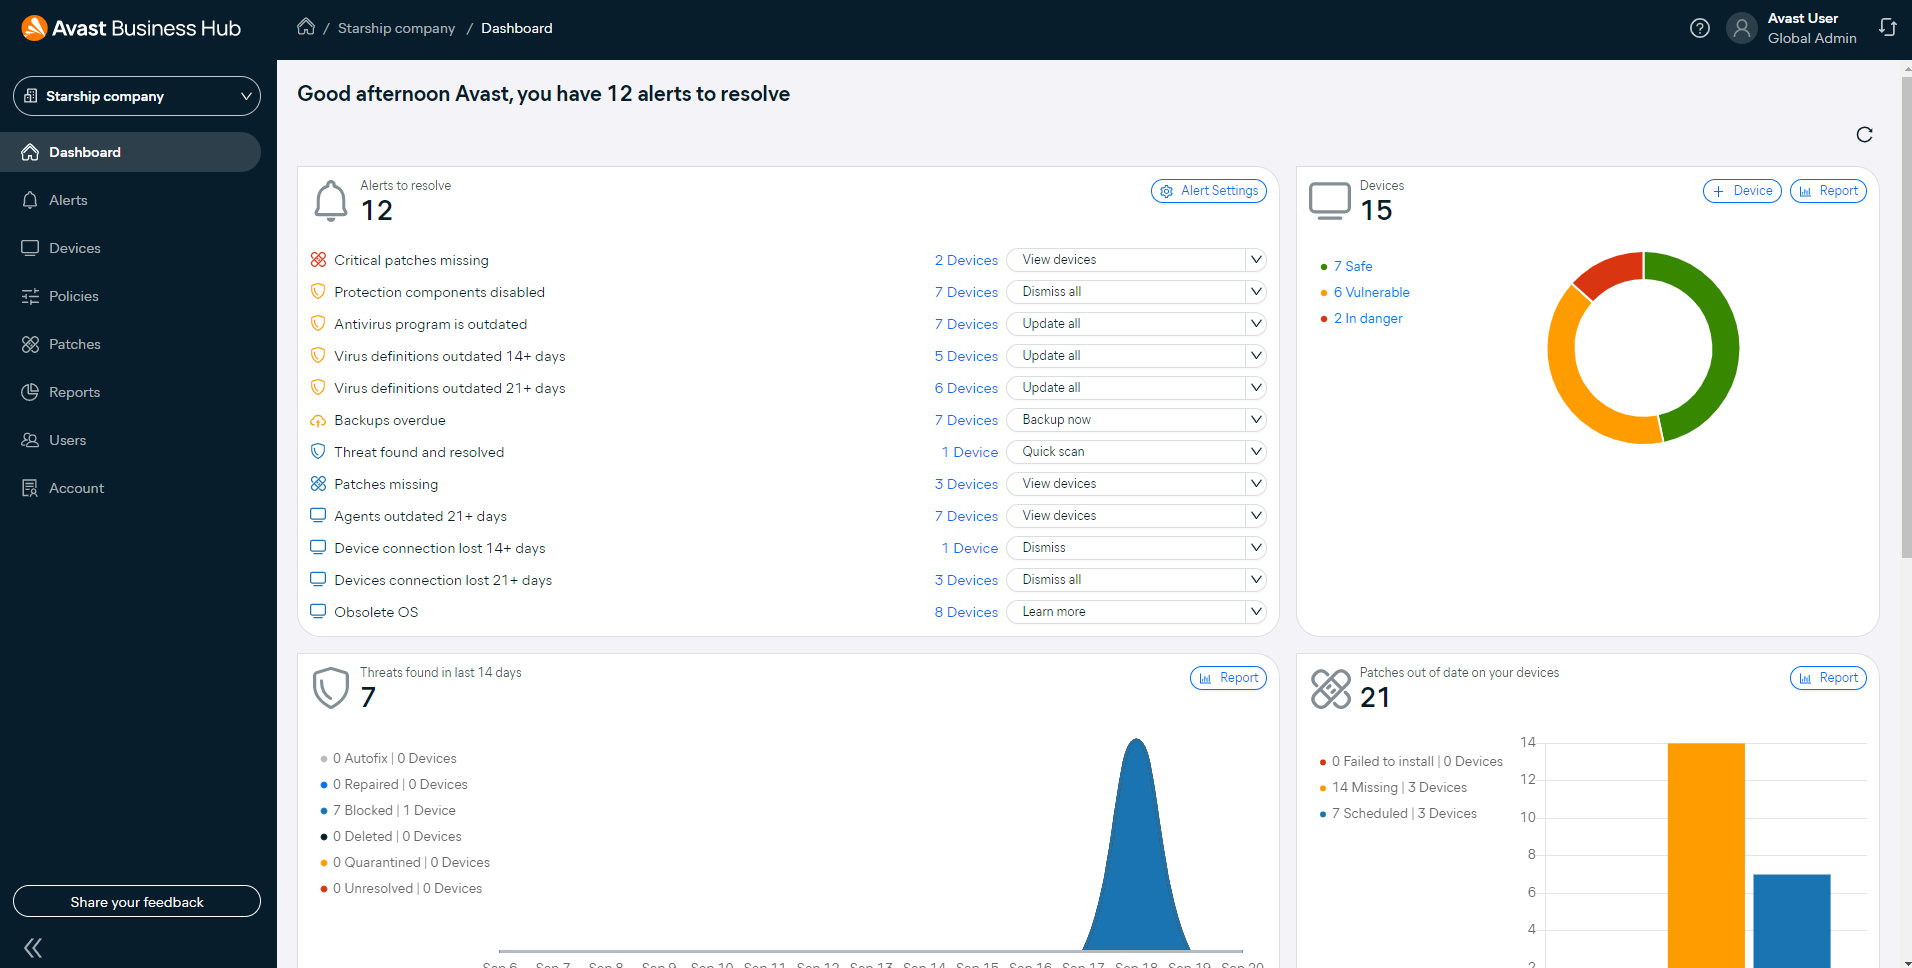
The customer-level Dashboard displays a few graphs for the selected customer's devices. You can see Alerts that need to be resolved, an overview of which devices are safe/vulnerable/in danger, threats found in the last 14 days, out of date patches, Cloud Backup usage (if applicable), and subscriptions.
Company Devices
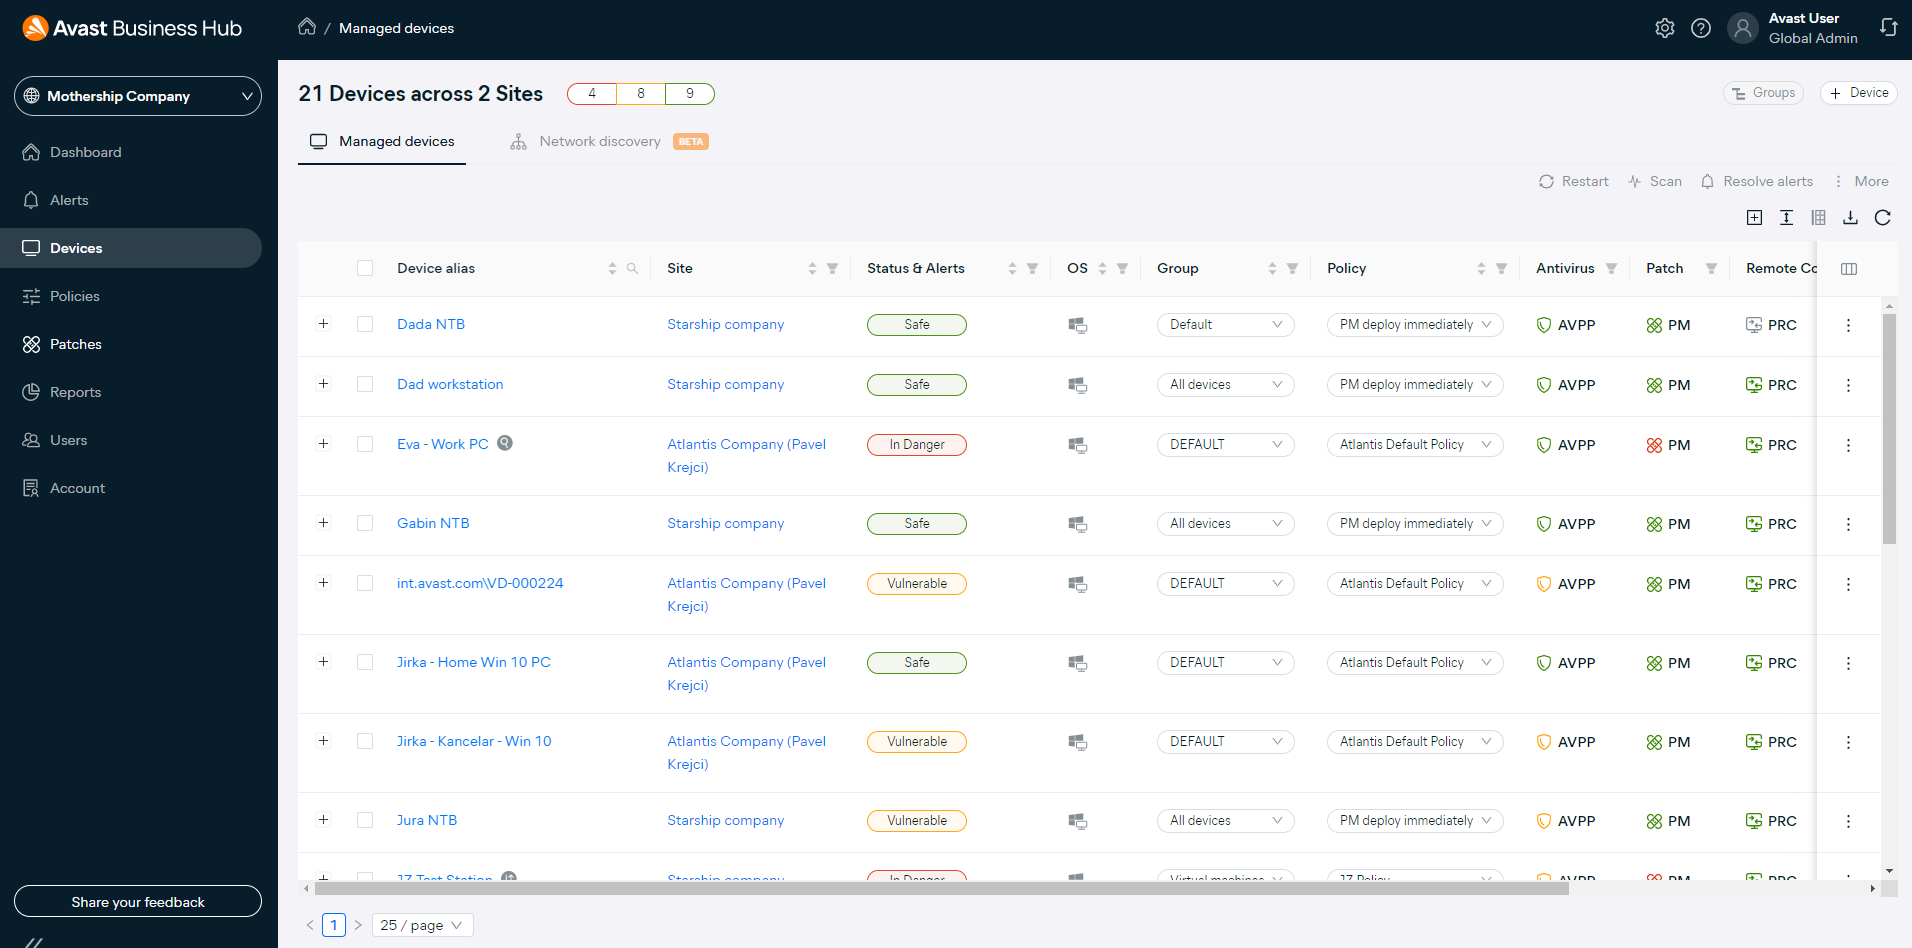
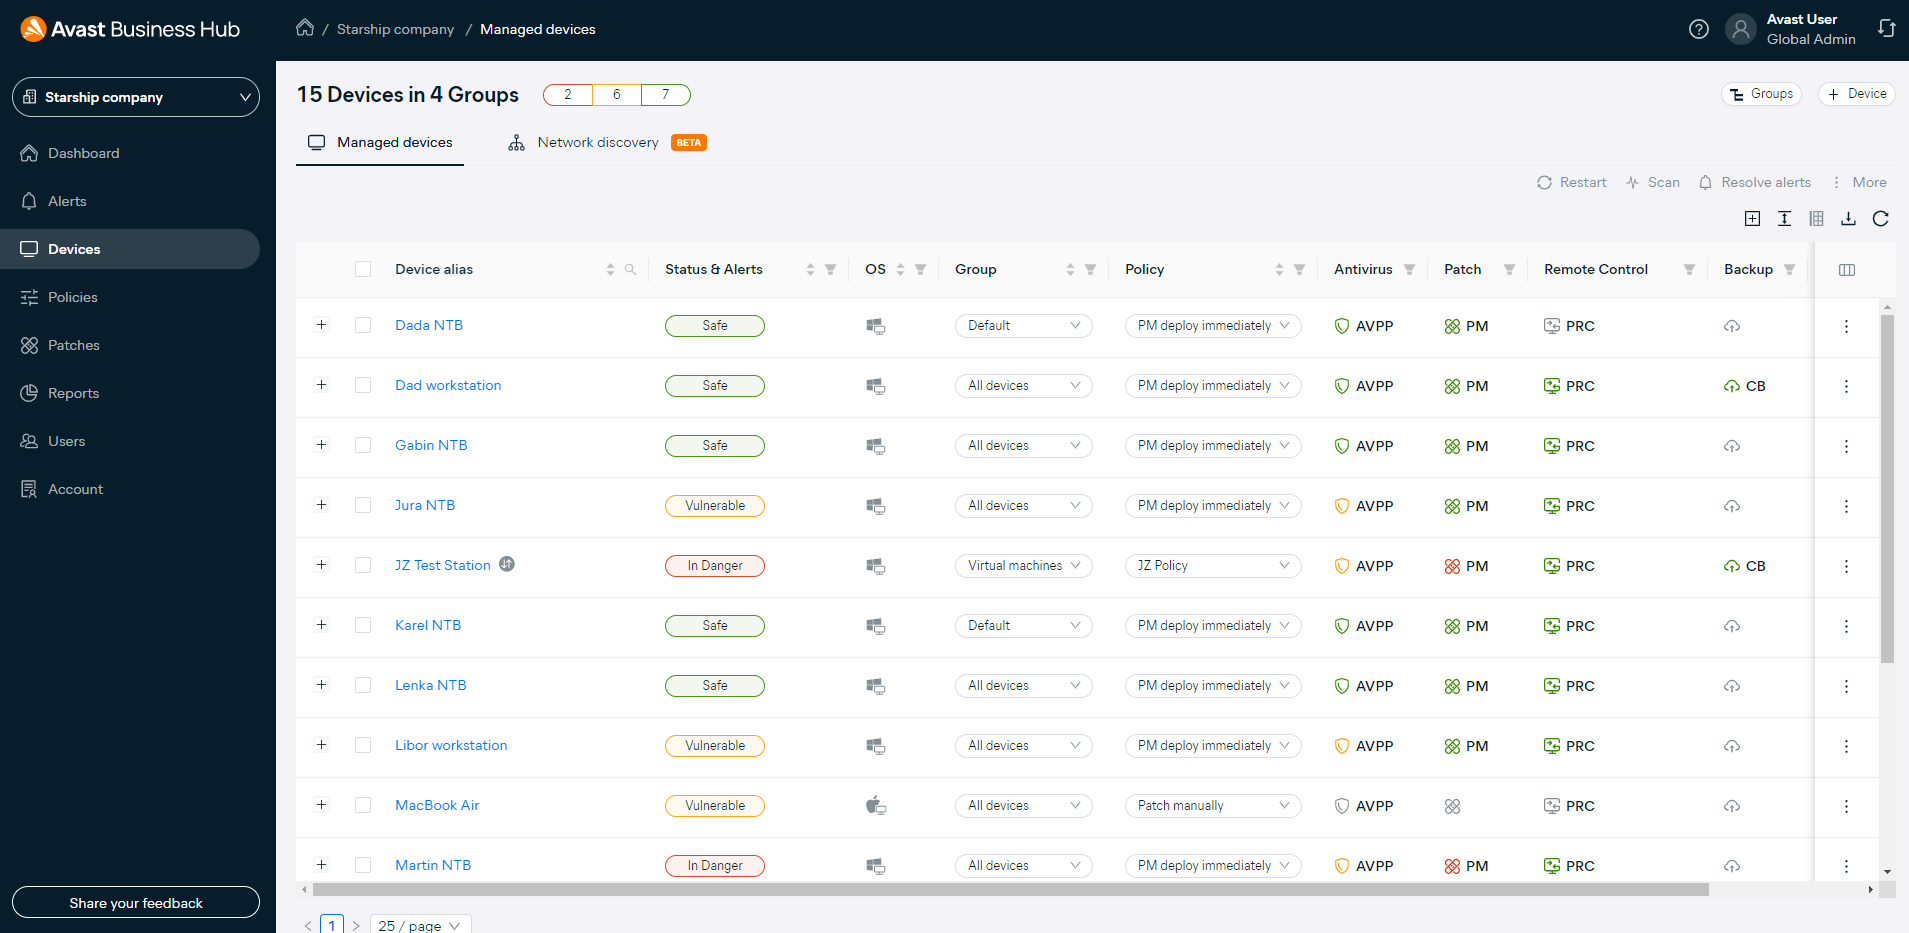
You can see an overview of all managed customers'/sites’ devices on the Devices tab, or select a single company from the drop-down menu. This will display device names, Site (if applicable), status and alerts, operating system, assigned group, assigned policy, Antivirus version, Patch Management subscription, Remote Control subscription, Cloud Backup subscription, and the time the device was last connected to the Hub.
Options on the right-hand side allow you to view the Groups (only available with customer selected), add a new device, complete other actions for selected devices, expand all device drop-downs, change table density, export device list, and refresh the list.
Top-Level
Customer-Level
Device Details
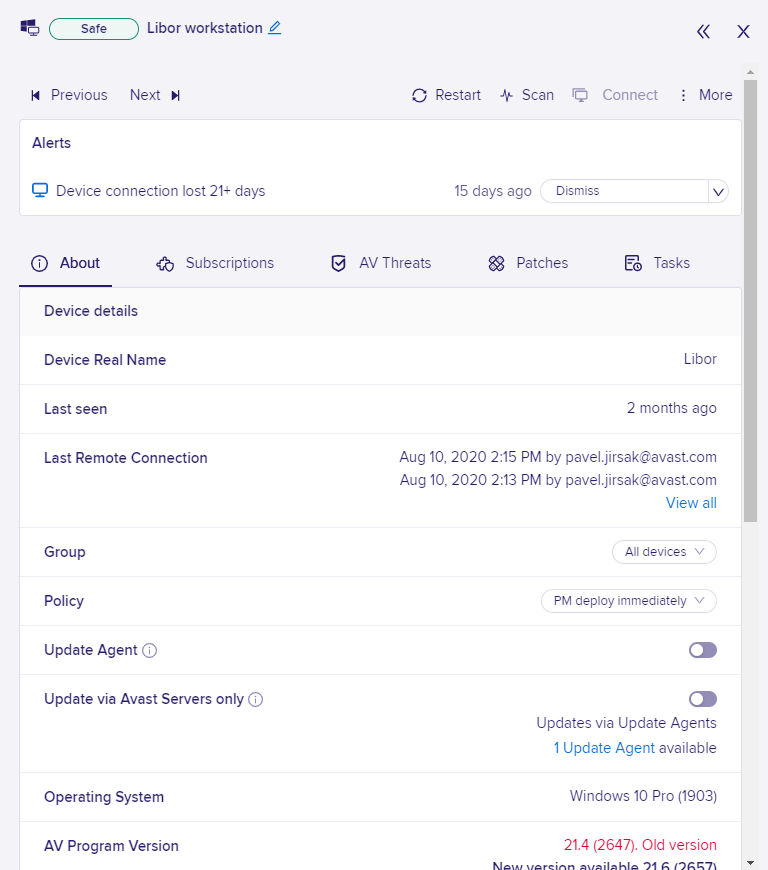
You can view details for a customer's/site’s device by clicking the device name in the list. Within this section you can resolve alerts, send restart or scan commands, use Remote Control to connect to the device, change the policy or group, and more.
You can also click on the three dots to the right of a device's Last Seen date in the Devices list, or select multiple devices and click More above the table, to view additional options:
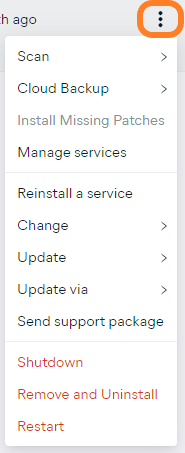
- Scan
- Full System Antivirus Scan: Manually start a Full System Scan on the device (see
- Advanced Antivirus Scans: Manually start Quick, Boot-Time, or Custom scan on the device (see
- Patch Scan: Manually scan for missing patches on the device (see Scanning Devices for Missing Patches)
- Full System Antivirus Scan: Manually start a Full System Scan on the device (see
- Cloud Backup
- Backup now: Run a one-time task to backup your data
- View data and restore: Access your Cloud Backup to revise and restore data (see Restoring Backed Up Files)
- Restore all from a device: Select restoration location and the device to restore data from and choose whether to replace any existing files
- Install Missing Patches: Manually install all missing patches on the device (see Deploying Missing Patches)
- Manage services: Install or uninstall various services (such as Antivirus, Patch Management, or Cloud Backup) on the selected device
- Reinstall a service: Choose a service to reinstall (for Windows Workstations and Windows Servers only)
- Change
- Change Group: Select a different group for the device (see Managing Device Groups)
- Change Policy: Select a different policy for the device (see Changing Devices' Assigned Policy)
- Update
- Update AV Virus Definitions Version: Manually update the virus definitions version (see Updating Antivirus Program and Virus Definitions)
- Update AV Program Version: Manually update the Antivirus program version (see Updating Antivirus Program and Virus Definitions)
- Update via
- Avast servers only: Select this option if you want the updates to be carried out exclusively via Avast servers
- Available Update Agents: Select this option if you want the updates to be carried out by an Update Agent (see Setting Up Master Agents).
- Send support package: Gather diagnostic data from the device to send to Avast Business Technical Support
- Shutdown: Send a command to shut down the device (see Shutting Down and Restarting Devices)
- Remove and Uninstall: Send a command to remove Antivirus from the device and the Console (see Removing Devices From Business Hub)
- Restart: Send a command to restart the device (see Shutting Down and Restarting Devices)
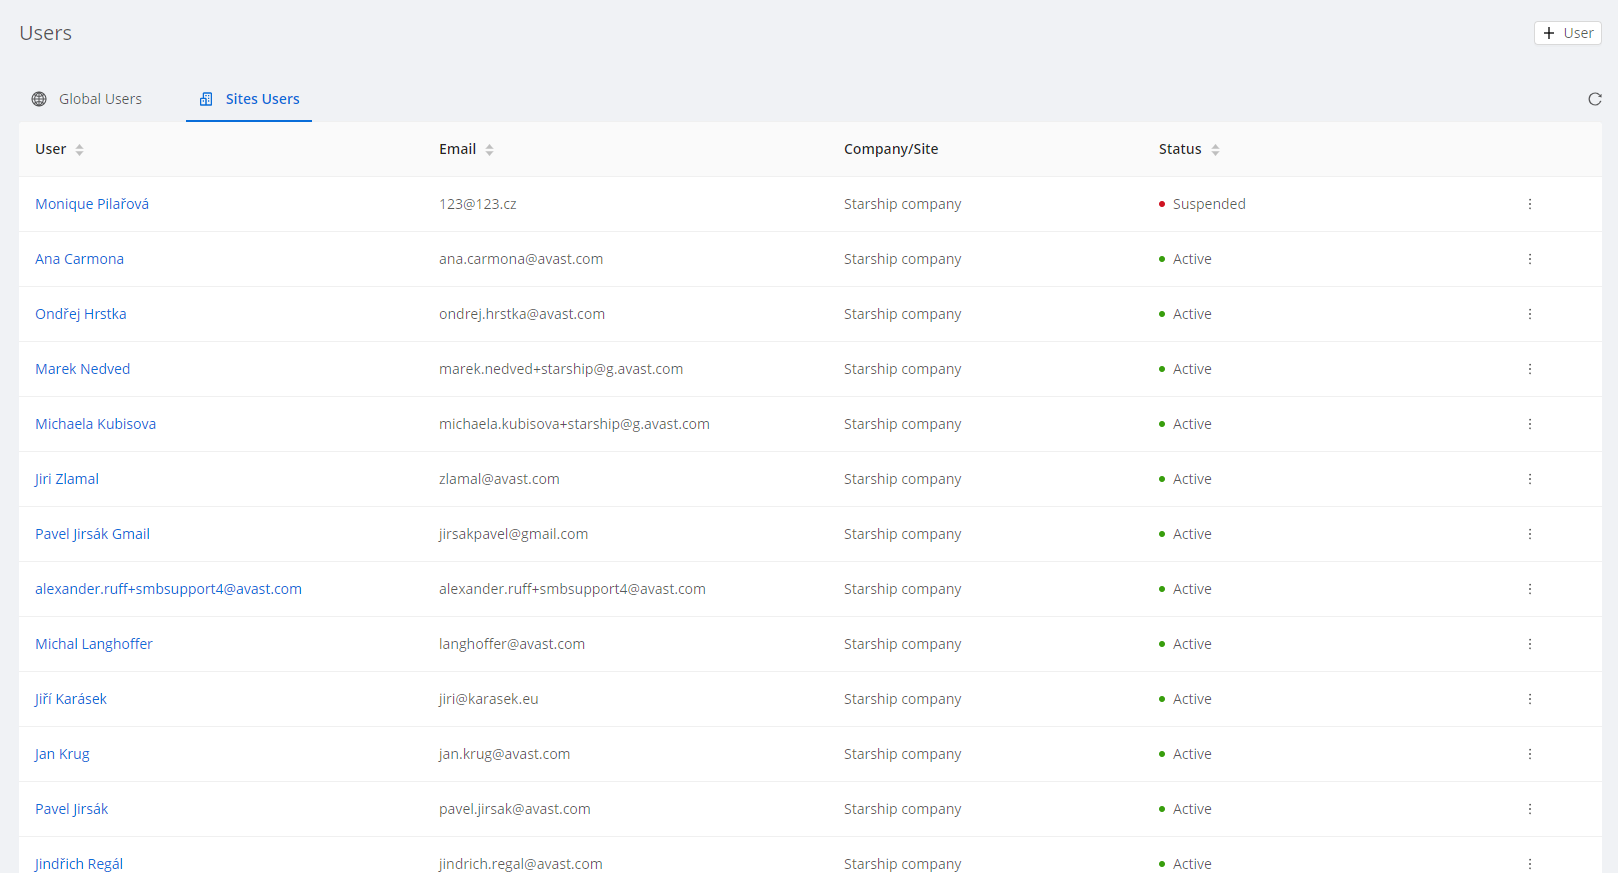
Users
The addition of a Hub required some changes to the way users and accounts are described.
- Global Users (Global Admins): Users who are able to manage their customers' networks (multi-tenant)
- Companies/Partners: Company administrators managing other sites/customers, made up of Global Admins
- Sites/Customers: Companies managed by the Company/Partner and its Global Admins
- Site/Customer Users: Users tied to a specific Site/Customer who cannot access the multi-tenant Hub, and can only manage or view a company from the single-tenant console (assigned either the Viewer or Admin roles as seen in Viewer vs. Administrator Permissions).
- Users can be tied to multiple companies and use Account Switching (see Adding and Managing Companies).
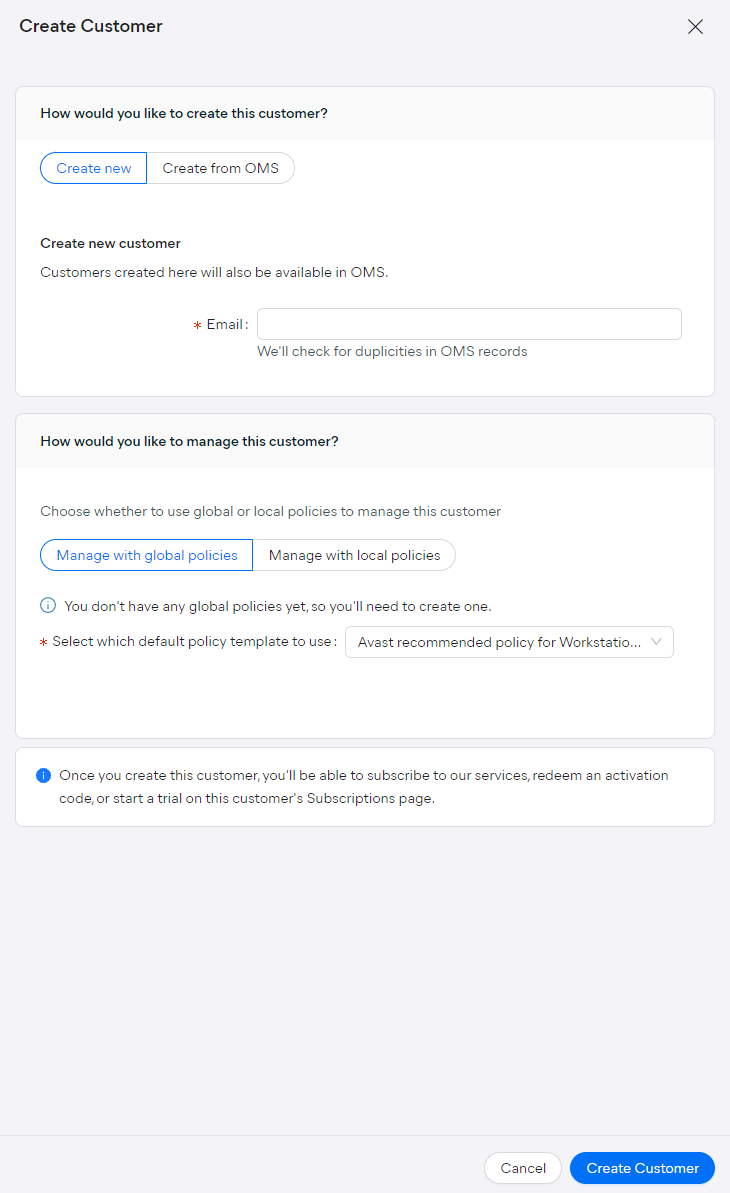
Global Admins can create new Sites/Customers to manage from the Hub's Dashboard. These Sites/Customers will have their own Cloud Console, but no access to the Hub. From the Dashboard with no customer selected in the left-hand pane, click + Site/Customer, fill in the details, then click Create Site/Customer.
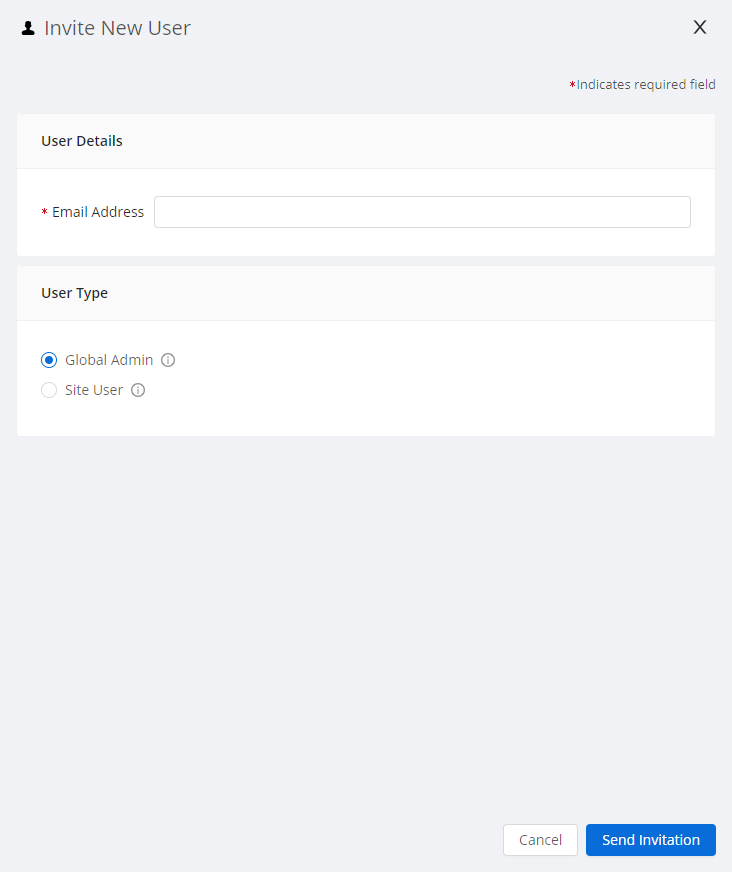
Global Admins can invite other users to also be Global Admins for the same Company/Partner they fall under, or can invite users as Site Users under a specific Customer (Company). From the Users page with no customer selected in the left-hand pane, click + User, fill in the details, then click Send Invitation.
If Site/Customer User is selected, you must also select whether the new Site/Customer User has Admin access, Viewer Access, or No Access to the various Sites/Customers you can manage. Site/Customer Users can have varying levels of access to different Sites/Customers, and will utilize Account Switching in their Cloud Console to switch between them.
Lastly, Global Admins can create what are essentially self-managed Customers who will not be able to be managed from the Hub. In the top-right of the Console click your name, then Your Profile. You will see the details for your account and the companies you can access and/or manage.
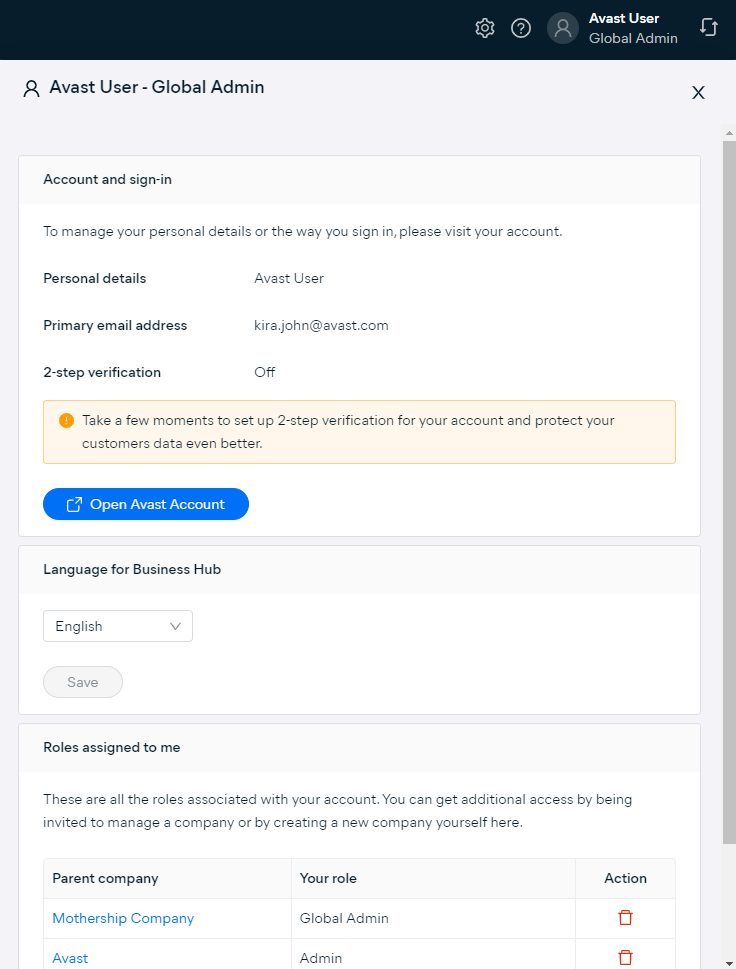
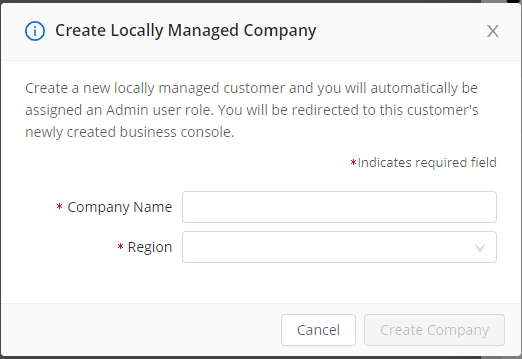
To create another company which will have its own single-company standalone Hub and will not be managed by your top-level account, click + Create Company, fill in the details, then click Create Company. You will be assigned as an Admin and will be able to use Account Switching in the Hub to view the new company.
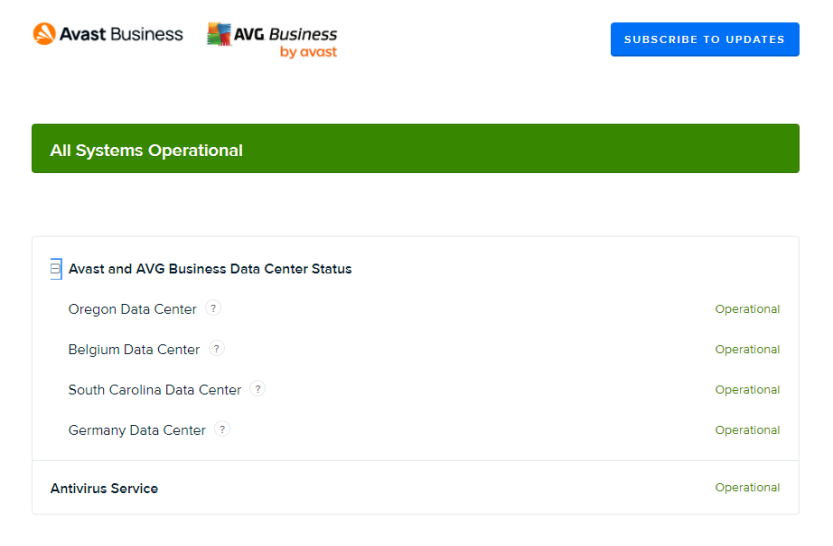
Data Center Locations
Avast has data centers in four locations:
- Oregon (status for cluster in New York data center)
- Belgium (status for cluster in Prague data center)
- South Carolina (status for cluster in Seattle data center)
- Germany (status for cluster in Frankfurt data center)
You can check their status anytime at https://businessconsole.status.avast.com/ and, if needed, subscribe to data center status updates.
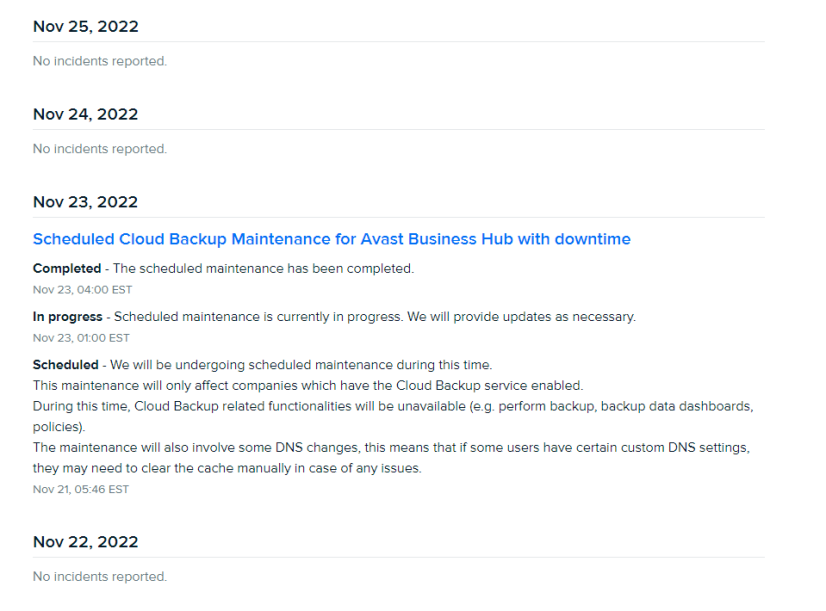
You can also see maintenance-related details here and if any incidents have been reported and when.
Other Articles In This Section:
Converting From Single-Tenant to Multi-Tenant Business Hub
Managing Your Business Hub Profile
Configuring Two-Factor Authentication for Business Hub
Related Articles: