PROXIMANOVA-LIGHT.OTF PROXIMANOVA-LIGHTIT.OTF PROXIMANOVA-EXTRABLD.OTF PROXIMANOVA-BOLD.OTFPROXIMANOVA-BLACK.OTF
Get this font in here!
This Article Applies to:
- Avast Business Hub
This article assumes that the user is aware of how ConnectWise works and already has this set up for their network.
This integration is available for the multi-tenant Business Hub only.
Getting Started
Adding the Avast Plug-In to ConnectWise Automate
The Avast Plugin must be added to your ConnectWise Automate Control Center before you can integrate with the Business Hub.
- Download the Avast Plugin
- Extract
Avast Antivirus.dllto a different location, such as your Desktop - Within the Automate Control Center, navigate to System > Plugin Manager > Advanced > Manage Plugins > Add Plugin
- Select the
.dllfile from the location you saved it to - From within the Plugin Manager, ensure the Avast Plugin is enabled
- Restart the Automate Control Center
Setting Up Integration
Before you can begin using the ConnectWise application to perform basic functions in Avast Business, you will need to set up the integration with the Hub:
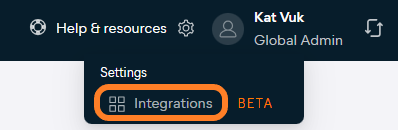
- Click the gear icon in the top right corner of the console, then select Integrations
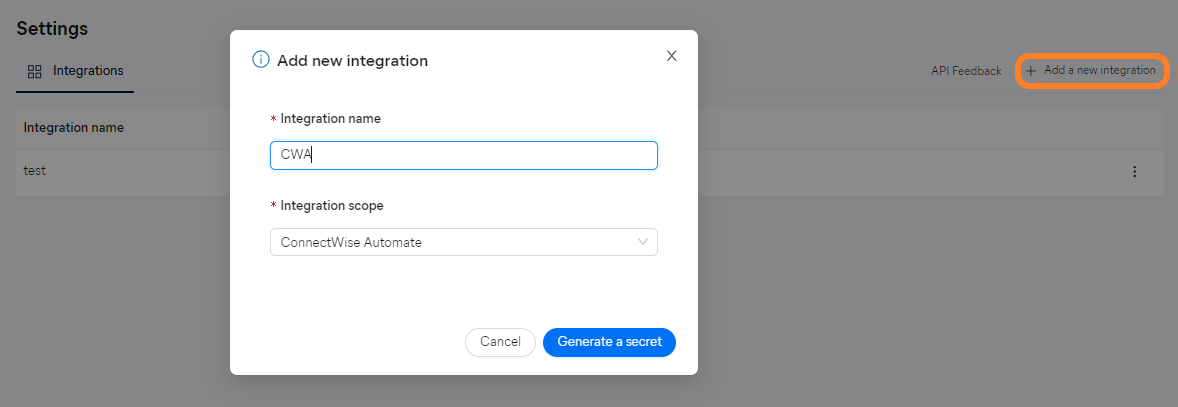
- Click + Add a new integration in the top right corner of the Integrations page
- In the dialog, enter the integration name and choose ConnectWise Automate as the integration scope
- Click Generate a secret
- Copy the generated Client ID and the Client Secret into your ConnectWise configuration
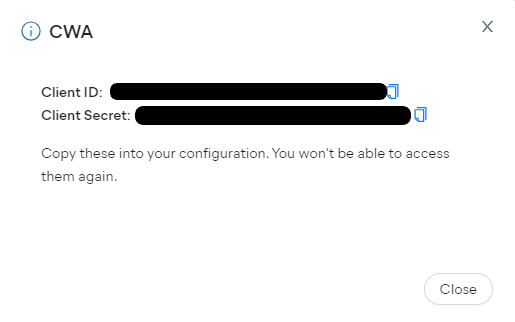
Note that once you close this dialog, you will not be able to view the secret again. If you need a new secret, click the actions menu (three dots) next to the integration and select Generate new secret.

Integration Settings
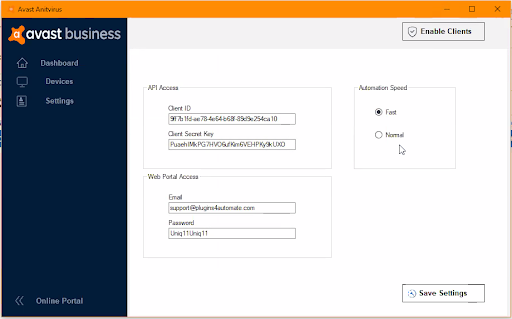
Automation Speed: this setting determines how quickly ConnectWise is going to cycle the service. Fast cycles every 6 seconds, while Normal cycles every hour on the half hour (ie 11:30, 12:30, …)
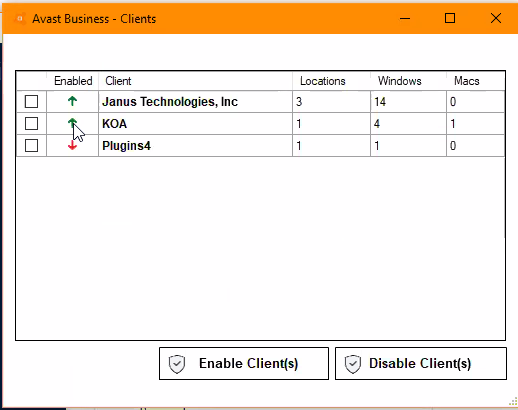
Enable Clients: this button opens the client window showing your locations and the number of devices available. You can click check boxes to enable Essential/Premium/Ultimate Business Security on these devices.
- Clients that are enabled will have Antivirus installed using the default group/policy for that particular company. The default group/policy can be configured from the Hub.
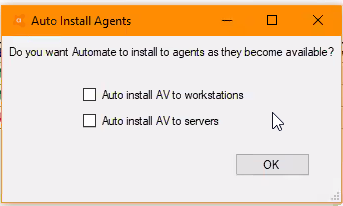
- If you do not automate installation of Antivirus to workstations and/or servers, you will have to do so manually.
Manually Installing Antivirus on Clients
- In ConnectWise, double-click on the Client name to open the client Console
- Click the Avast Business tab
- Select devices by holding
SHIFTorCTRL - Right-click and select Install Avast
Avast Business Details
- In ConnectWise, double-click on the Client name to open the client Console
- Click the Avast Business tab
- Click the Dashboard tab to see an overview of the installed devices in the network
- Click the Devices tab to see which devices are installed or not installed
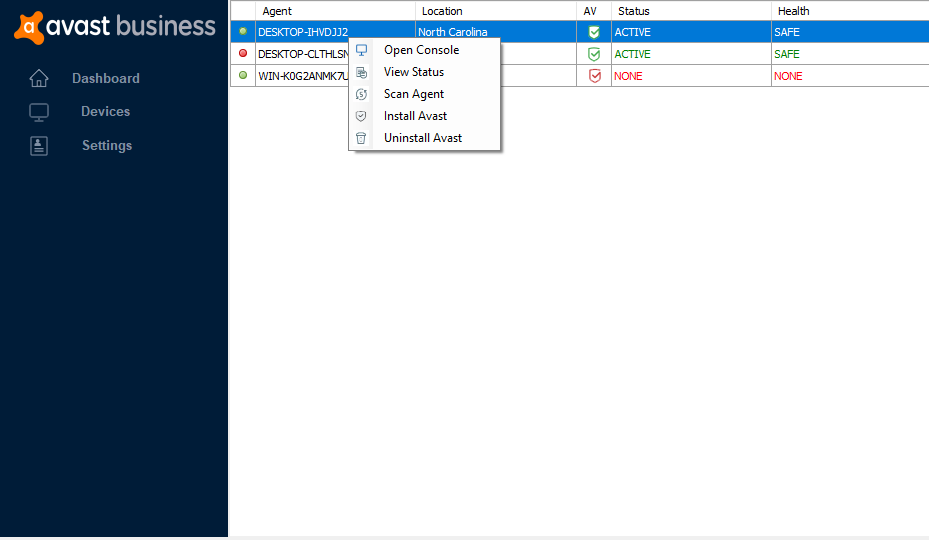
- Right-click a device to access other actions, which are detailed in the next section
- Click the Settings tab to select whether Antivirus is auto-deployed to workstations and/or server devices added to the Client network
Managing Your Devices with ConnectWise
The following options are available from the Client or Company Console via the Avast Business tab, when you right-click on a device name.
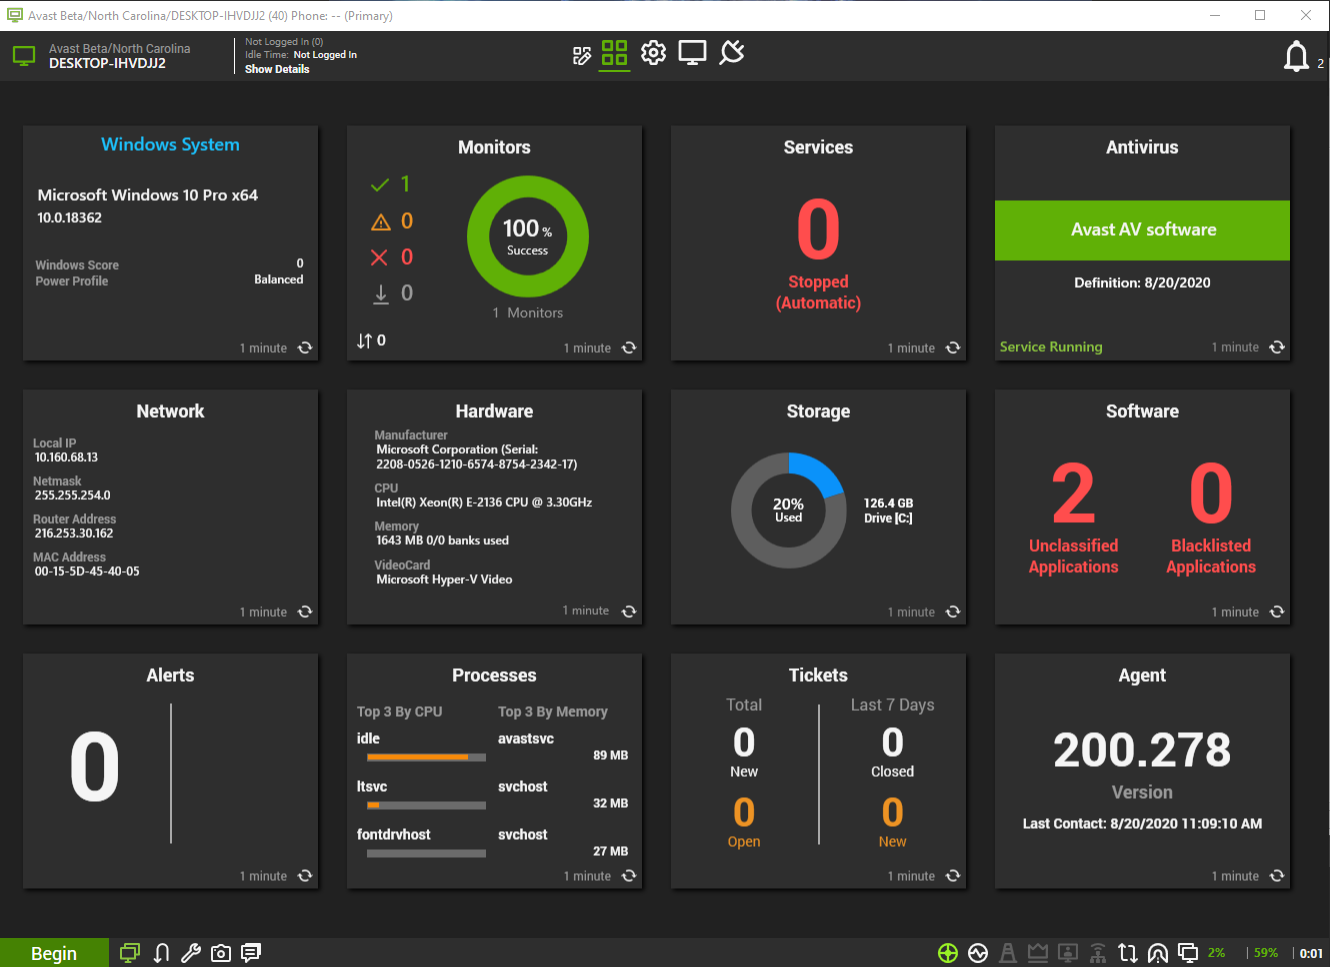
Open Console
This option opens the device console in ConnectWise, which will display information about the device and allow you to run scripts or remotely connect to the device.
Many of these buttons, such as Storage and Software, can be clicked to view even more detail.
View Status
With this option you can view an overview of any items affecting the status of the device, which will be retrieved from the Avast Business console. The most important lines are Status, Health, and the results of the Risk Checks. If you see any numbers besides 0 in the Risk Checks section, a threat has been found on the device and should be resolved as soon as possible

Scan Agent
This option will run a quick Antivirus scan on the device based on the settings in the assigned Policy. For example, if you have chosen that threats should be automatically repaired, this will occur after the scan.
Install Antivirus
This will only work for devices which do not already have Antivirus installed (ie listed as NONE under the Status column). Essential/Premium/Ultimate Business Security will be installed on the device and its status will update to ACTIVE when the installation is complete. Please note the device may require a restart.
Uninstall Antivirus
This will only work for devices which have Antivirus installed (ie listed as ACTIVE under the Status column). Essential/Premium/Ultimate Business Security will be removed from the device, and its status will update to NONE when the uninstallation is complete. Please note the device may require a restart.
Other Articles In This Section:
Integrating Business Hub With Business API Gateway
Troubleshooting the ConnectWise – Avast Business Integration
Related Articles: