PROXIMANOVA-LIGHT.OTF PROXIMANOVA-LIGHTIT.OTF PROXIMANOVA-EXTRABLD.OTF PROXIMANOVA-BOLD.OTFPROXIMANOVA-BLACK.OTF
Get this font in here!
This Article Applies to:
- Avast Business Hub
Device groups in Business Hub are a convenient tool for facilitating device management further. They provide greater ease of administration by enabling you to sort the devices in the console however you wish - by department, location, etc. You can even create subgroups within your groups, which can help you mirror the devices' organizational structure more accurately.
Adding, Editing, and Deleting Groups
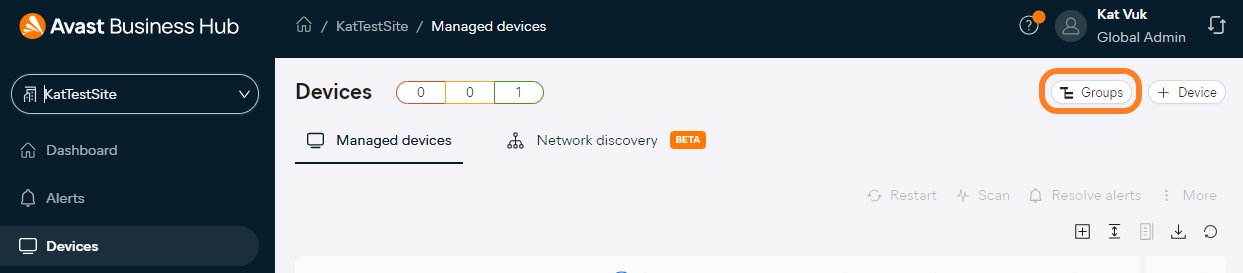
To create a group, use the Groups button located in the top right corner of the console's Devices page.
In the multi-tenant/partner console, this option will only be available at the site/customer level, as all devices within a group structure must belong to the same site/customer.
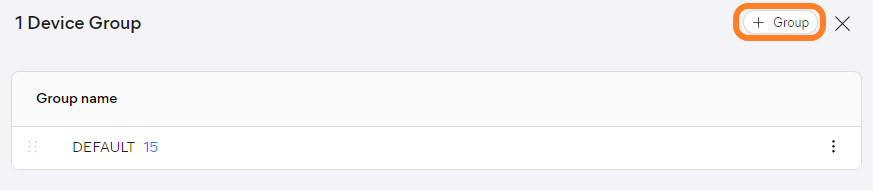
In the Groups drawer that opens, you will see the default group, containing all company
To create a new group, click + Group in the top right corner of the drawer.
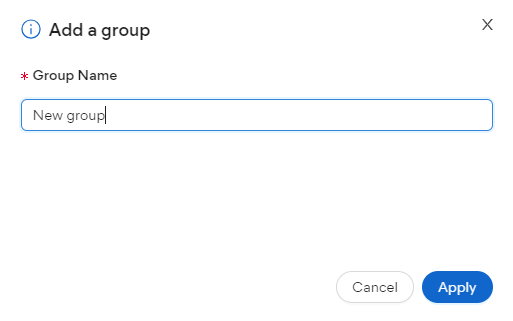
In the pop-up dialog, type the name of the group, then click Apply.
As previously mentioned, all groups you create will descend from the default one.
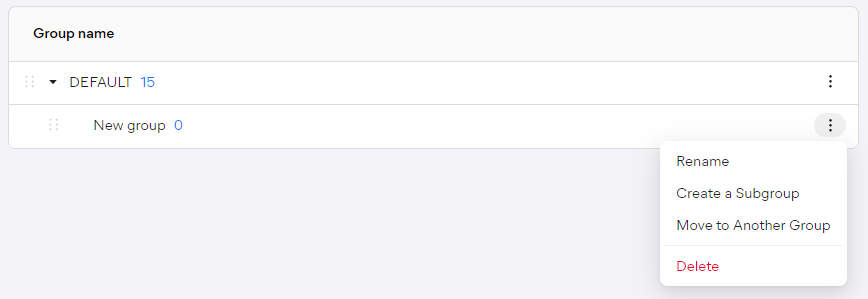
Via the actions menu of a group (three dots), you can rename or delete the group, add subgroups to it, or move it to a different place in the structure.
Moving Devices Between Groups
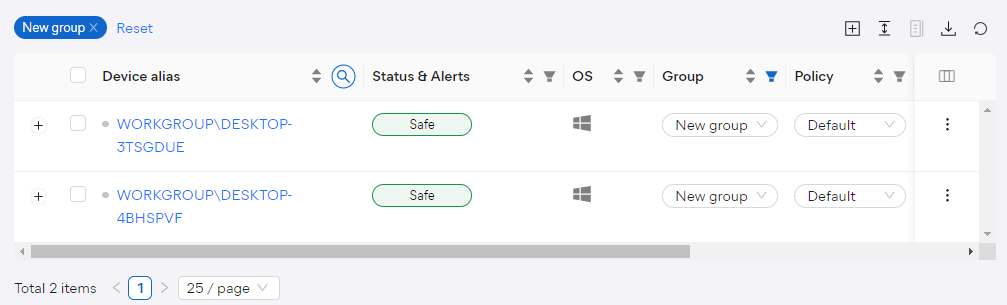
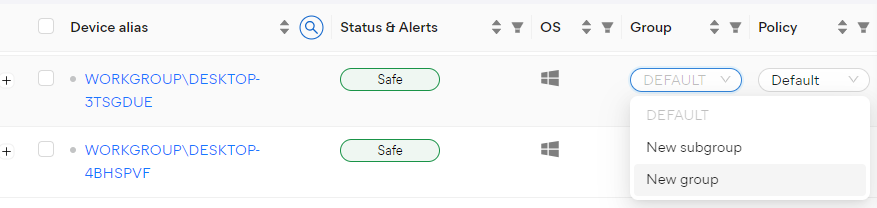
The quickest way to move a single device from one group to another would be via the drop-down menu in the device's Group column.
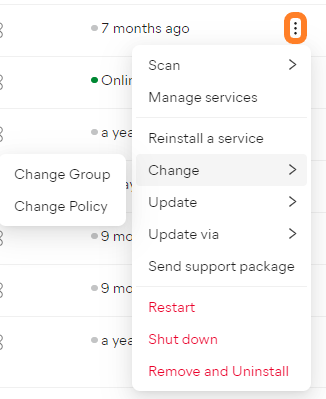
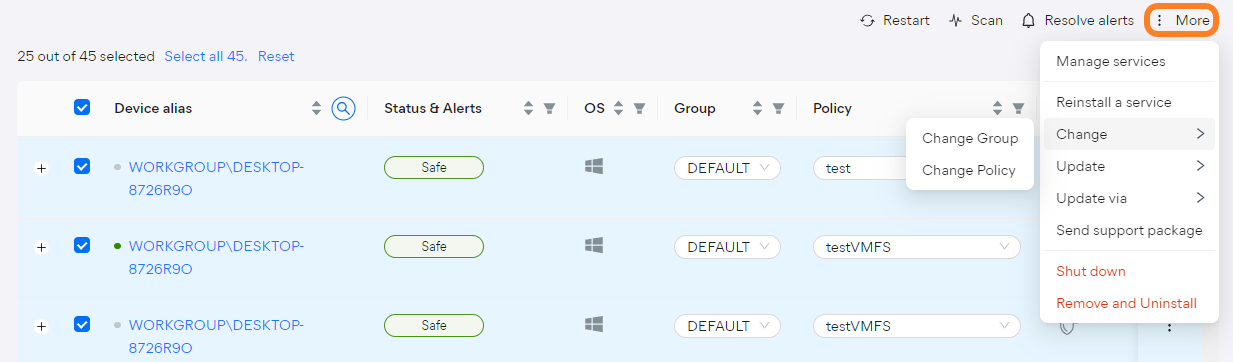
The same can be done by opening the device's actions menu (three dots), then hovering over Change and selecting Change Group.
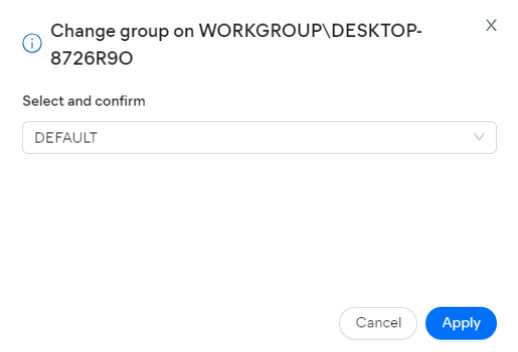
In the pop-up dialog, use the drop-down menu to select the group you wish to switch the device to, then click Apply.
One more way to change a device's group is from the device's Detail drawer - use either the actions menu in the top right corner or the drop-down menu in the About tab.

If, however, you need to change the group for multiple devices, tick the checkboxes next to those devices, then select More > Change > Change Group.
In the multi-tenant/partner console, this option will only be available when all selected devices belong to the same site/customer. The easiest way to ensure that is to perform this action at the site/customer level.
Whichever way you choose, the changes will be immediately visible in the Groups drawer.
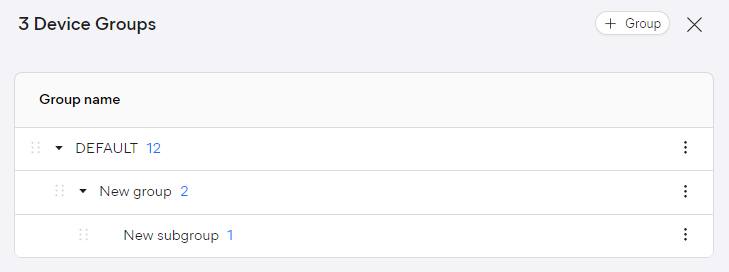
Clicking the device count of a group will open the Devices page, filtered to show only devices belonging to that group.