PROXIMANOVA-LIGHT.OTF PROXIMANOVA-LIGHTIT.OTF PROXIMANOVA-EXTRABLD.OTF PROXIMANOVA-BOLD.OTFPROXIMANOVA-BLACK.OTF
Get this font in here!
This Article Applies to:
- Avast Small Office Protection
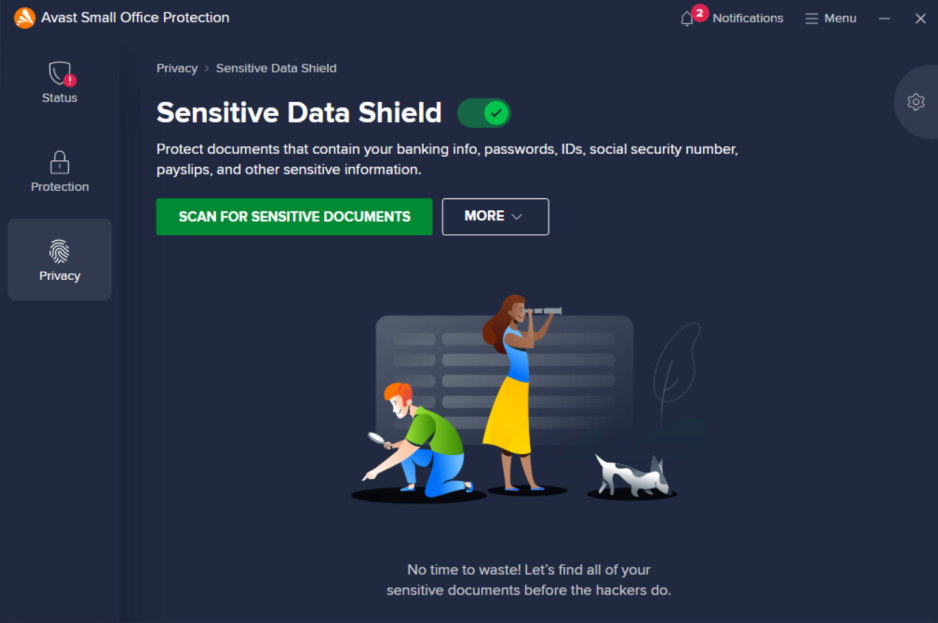
If malware or hackers attack your PC and gain access to documents containing your personal data such as banking details, passwords, IDs, payslips, and other sensitive information, your identity can be stolen and misused. Sensitive Data Shield is designed to scan for and protect such documents against malware and unauthorized access.
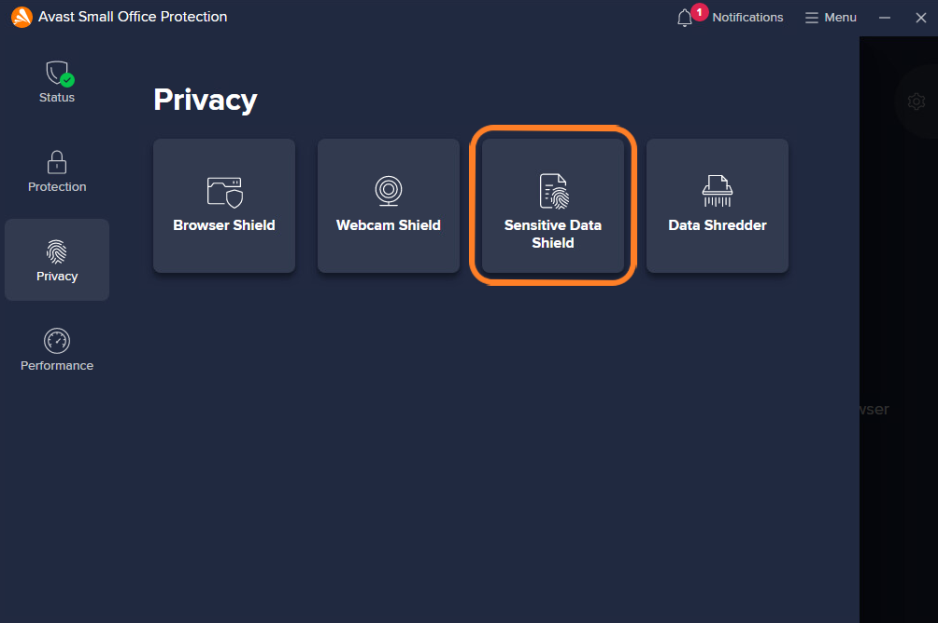
Enabling and Using Sensitive Data Shield
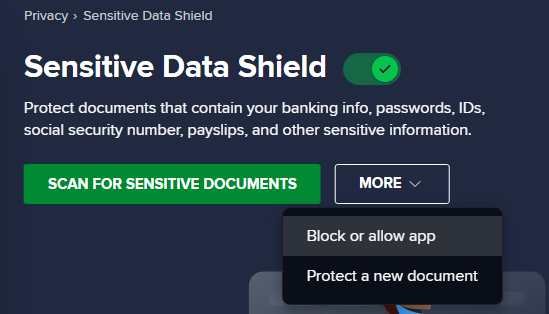
Sensitive Data Shield can be accessed from the Privacy section of the client UI.
On the Sensitive Data Shield screen, you can start scanning for sensitive documents.
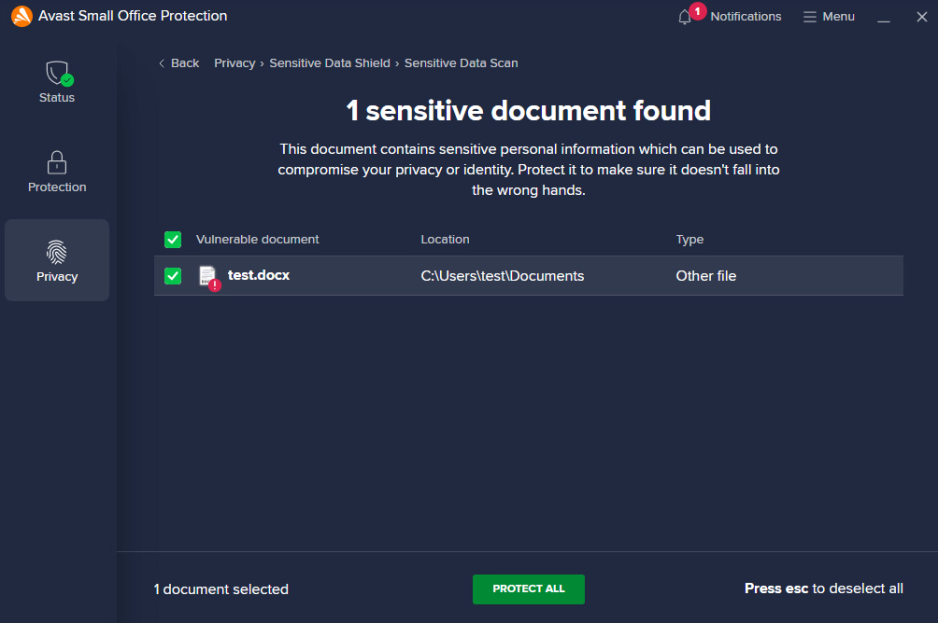
After scanning, Sensitive Data Shield displays a list of any unsecured .pdf, .doc, .docx, .xls, and .xlsx documents found on your PC that contain sensitive data. You can choose if you want Sensitive Data Shield to protect all or some of these files, and also protect these files from other users on the same PC.
The protected files will be visible directly in the UI.
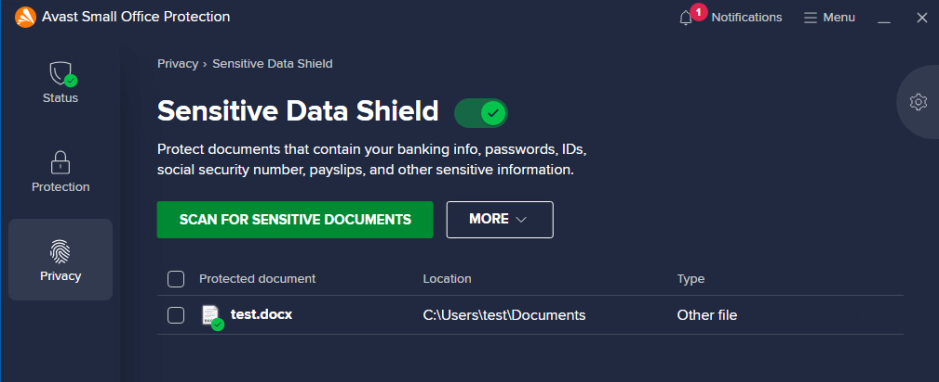
Via the search icon when highlighted, you can open the document directly.

Highlighting individual files, you can hit the X to stop protecting the document.
Additional Options
Via the More > Protect a new document option, you can manually select a document from your File Explorer to protect with Sensitive Data Shield.
Clicking the Block or allow app option will bring you directly to the Blocked & Allowed apps section of the settings (see Blocked & Allowed Apps below for more information).
Configuring Sensitive Data Shield Settings
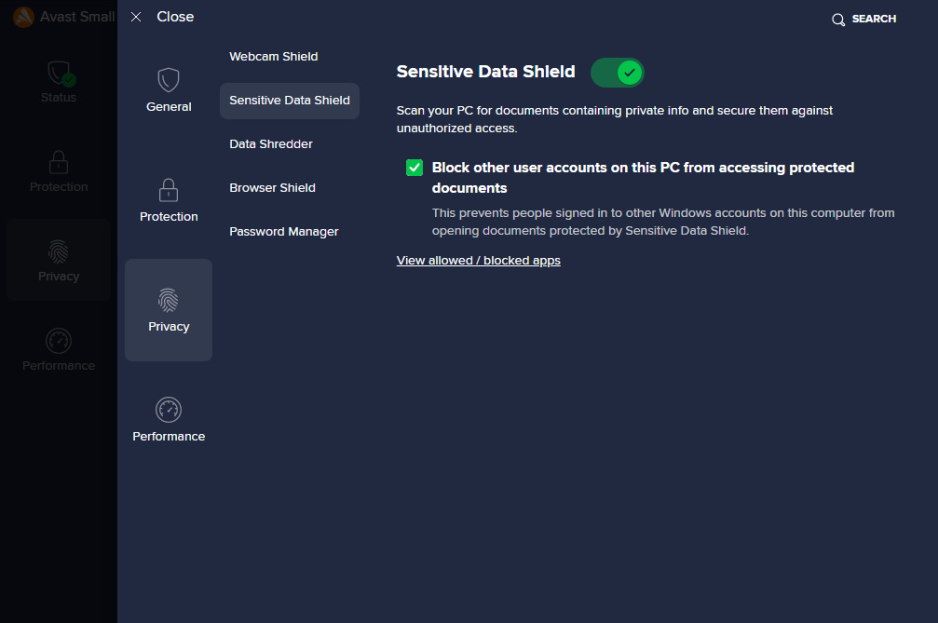
Advanced Sensitive Data Shield settings can be accessed by either clicking the gear icon on the Sensitive Data Shield screen or navigating to Menu > Settings > Privacy > Sensitive Data Shield.
Here, you can block other user accounts on the device from accessing the protected documents. This is especially important on shared PCs.
Clicking the View allowed / blocked apps link at the bottom will bring you to the Blocked & Allowed apps list (see below).
Blocked & Allowed Apps
As mentioned above, clicking the View allowed / blocked apps link at the bottom of the settings screen (or the Block or Allow App button on the Sensitive Data Shield screen) will bring you to the Menu > Settings > General > Blocked & Allowed apps section of the client UI, used by Sensitive Data Shield, as well as Ransomware Shield, Browser Shield, and Webcam Shield.
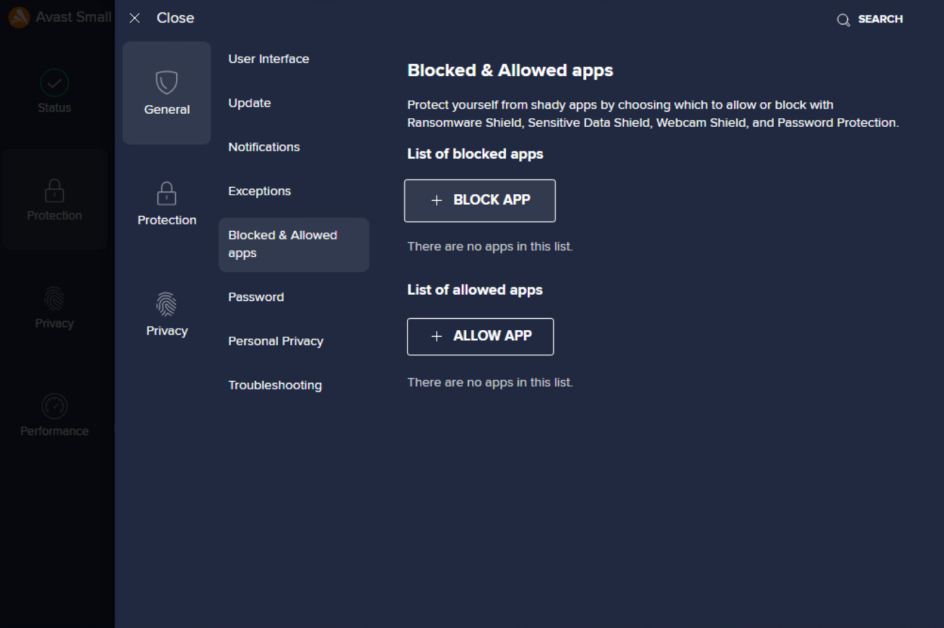
Here, you can configure individually each application that will be blocked/allowed and include whichever of the available shields/components. Rules set here will override the general configuration.
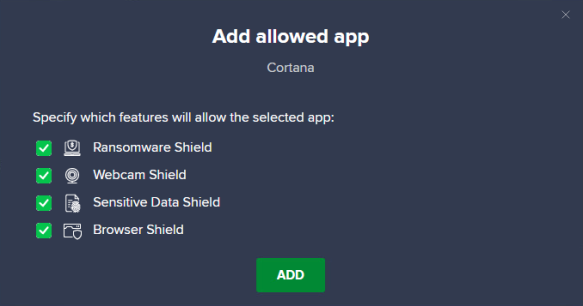
Clicking Block App or Allow App will open a dialog where you can either choose an active application directly from the list or click Select app manually to navigate elsewhere on the disk.
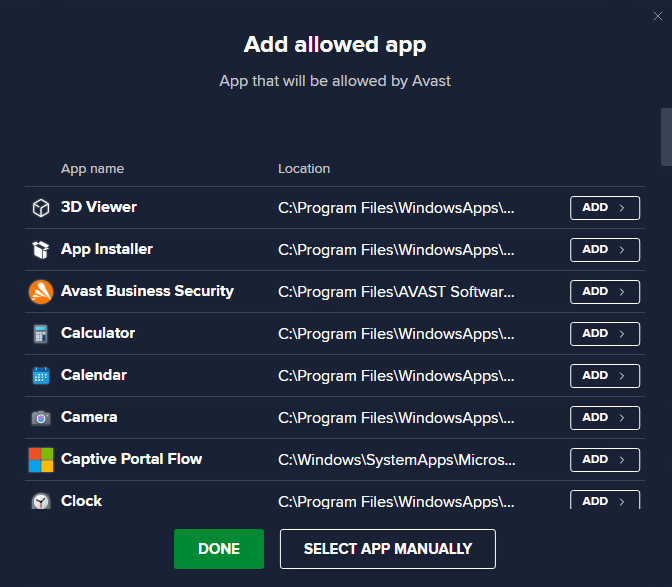
Once you select an app, define which shields/features are applied for that app, then click Add.
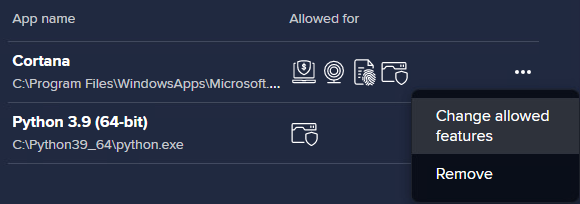
On the Blocked & Allowed Apps list, you will see the added applications and which components they apply to. You can edit or remove any listed app via its actions menu (three dots).
Other Articles In This Section:
Security Browser Extension (Avast Online Security & Privacy)
Services Available via Business Hub Only
Related Articles: