PROXIMANOVA-LIGHT.OTF PROXIMANOVA-LIGHTIT.OTF PROXIMANOVA-EXTRABLD.OTF PROXIMANOVA-BOLD.OTFPROXIMANOVA-BLACK.OTF
Get this font in here!
This Article Applies to:
- Avast Business Hub
Once you have downloaded the installer file from your console to a desired device
Installing on Windows
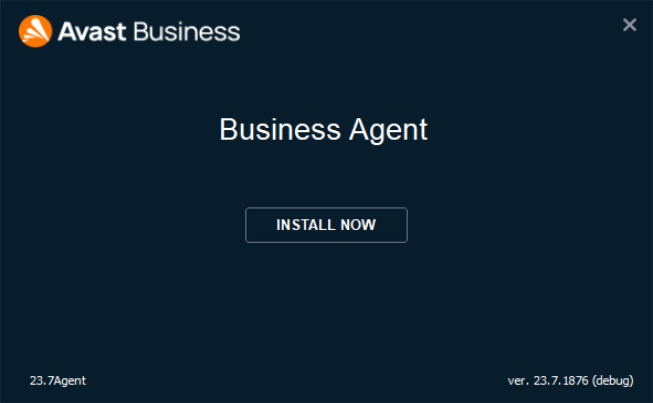
- Double-click the installer to run it
- If prompted, allow the installer to make changes to the device
- Click Install now to initialize the agent setup
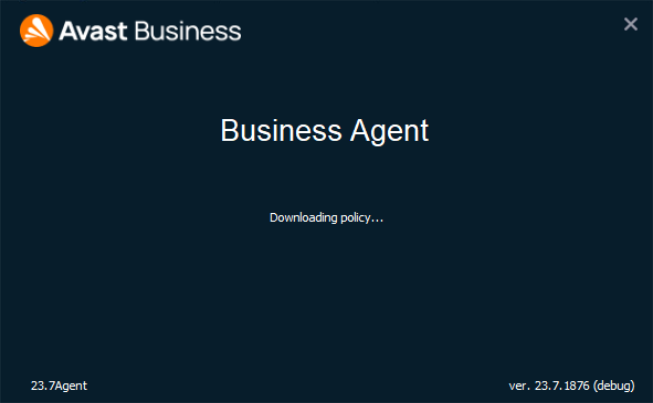
- Wait for the setup process to finish
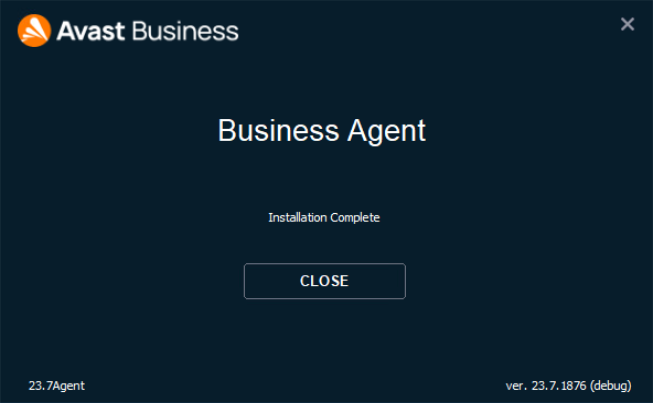
- Upon successful completion of the setup, click Close to exit the installer (the deployment of any included services will continue in the background)
Once the Avast services/tasks start running (visible in Windows Task Manager), the client UI can be opened.
The device will be populated in the console after the installation completes — once the services finish their setup, they will become activated.
Any available service that has not been included in the installer can be added post-installation if needed, and any installed service can be removed anytime as well. For more information, see Managing Services.
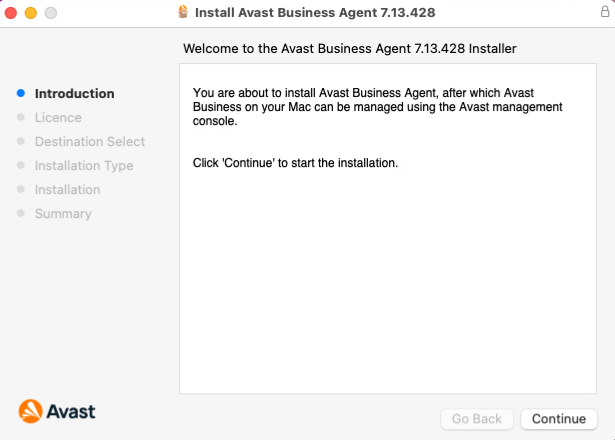
Installing on macOS
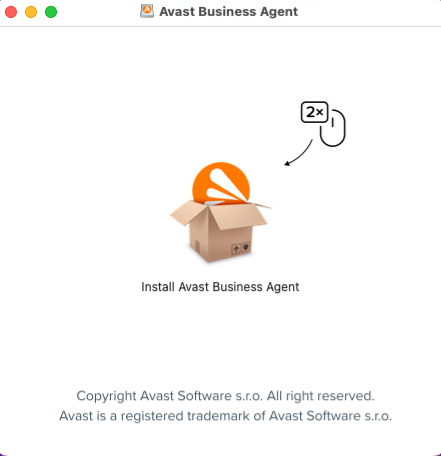
- Double-click the installer to run it (if prompted, allow the installer to make changes to the device)
- Read the introduction, then click Continue
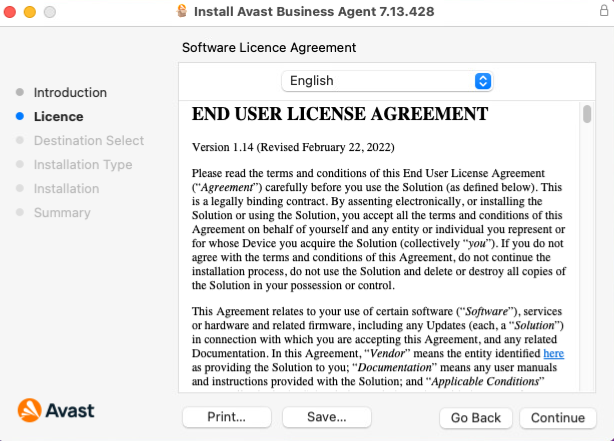
- Read the EULA, then click Continue again
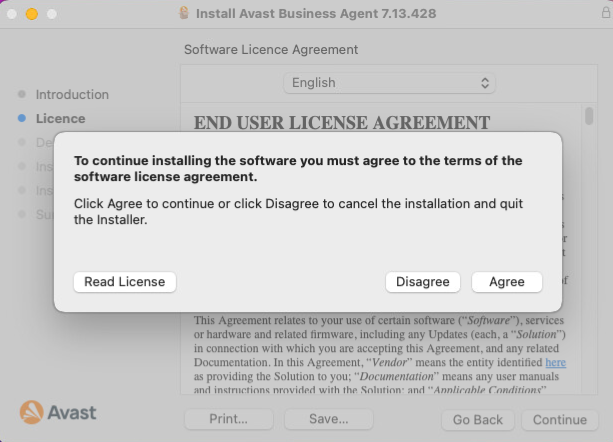
- Agree to the terms to proceed with the installation
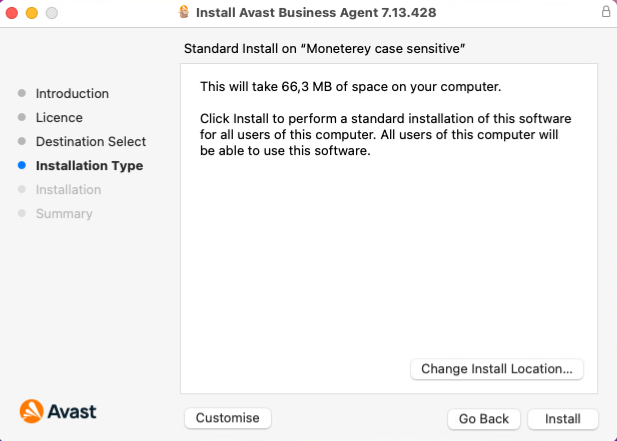
- Click Install to perform a standard installation for all users of the computer (you can change the install location first if you wish)
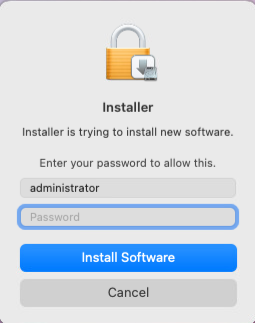
- If prompted, enter your admin credentials to allow and start the installation
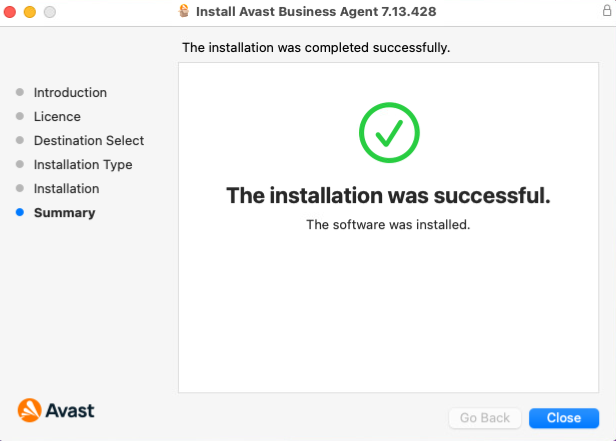
- Wait for the installation process to finish, then click Close to exit the installer
The device will be populated in the console after the installation completes — once the services finish their setup, they will become activated.
Any available service that has not been included in the installer can be added post-installation if needed, and any installed service can be removed anytime as well. For more information, see Managing Services.
Upon successful installation, the client UI will automatically open.

Before the client setup is complete, you will be required to allow Avast system extension and proxy configurations, provide full disk access, and update the certificate settings.
Some newer versions of macOS will ask for your password during the setup, and the setup might complete before the dialog for allowing the system extensions/certificate changes appears.
In some cases, a bug related to certain macOS versions will prevent allowing the necessary permissions. If you run into this issue, refer to Troubleshooting Permission Issues.
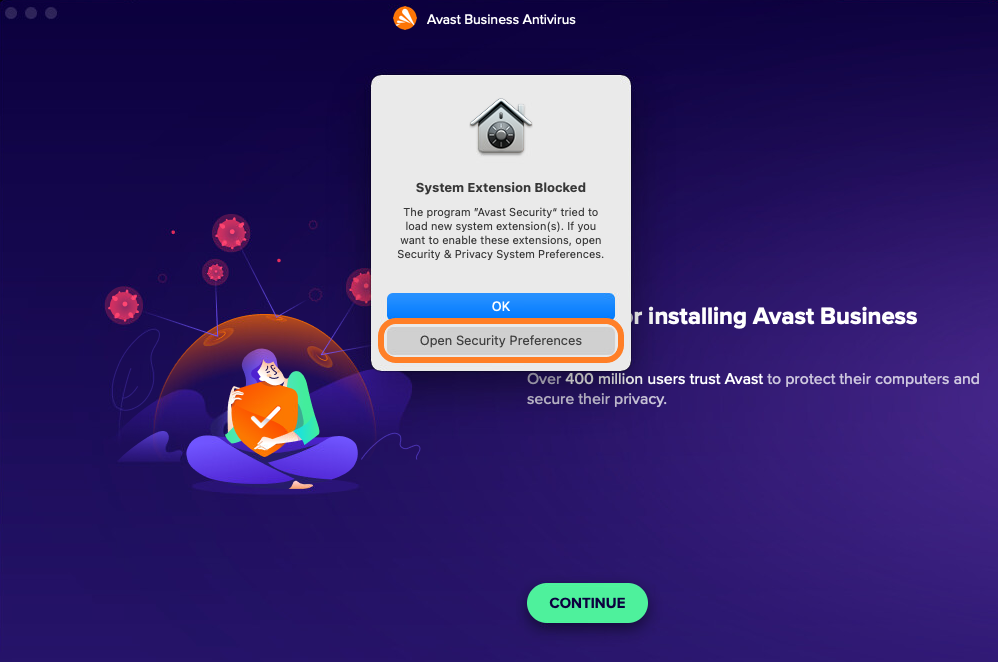
Allowing System Extension
During the setup, Avast will attempt to load a new system extension, and this action will require your permission. When the System Extension Blocked notification appears:
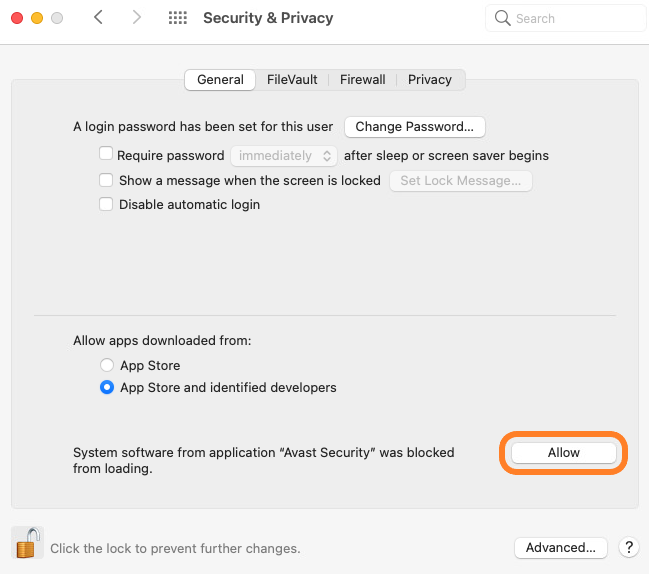
- Click Open Security Preferences
- Click Allow
If your settings are locked, click the lock icon in the bottom left corner, enter your admin credentials, then click Unlock.
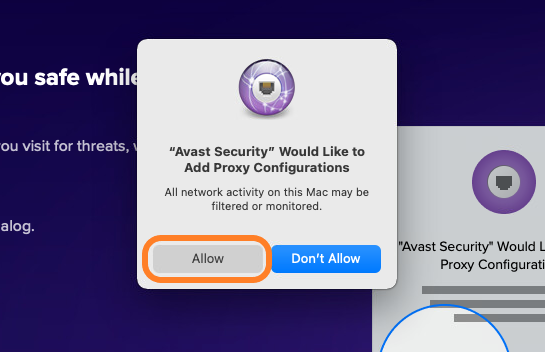
Adding Proxy Configurations
Certain proxy configurations will need to be added for Mail Shield and Web Shield in order to create the MITM-type scanning. To add proxy configurations:
- Click Open Confirmation Dialog
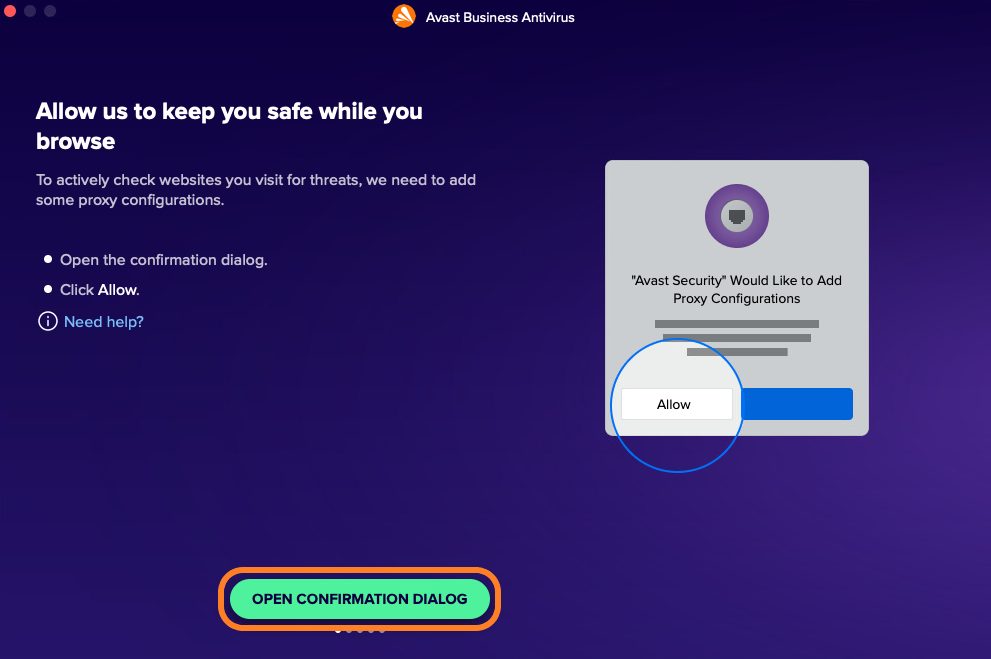
- Click Allow
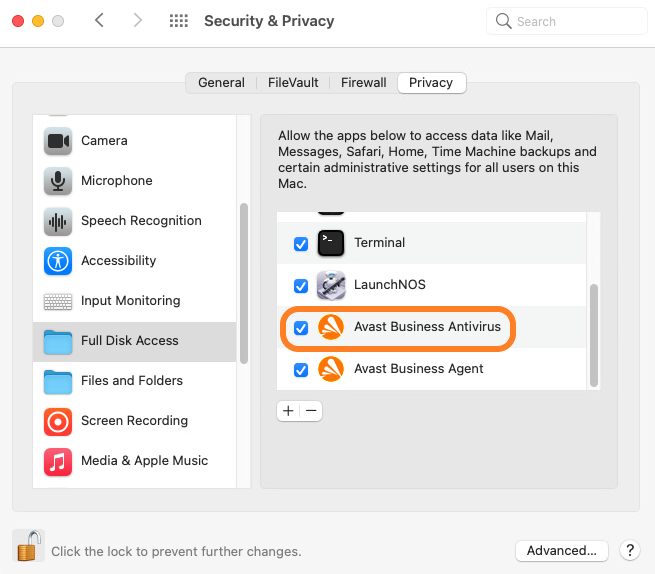
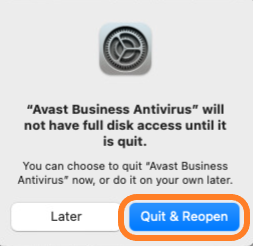
Allowing Full Disk Access
Avast will also need permission to access your disk so it can scan it for threats. To provide full disk access to Avast Business Antivirus:
- Click Open System Preferences
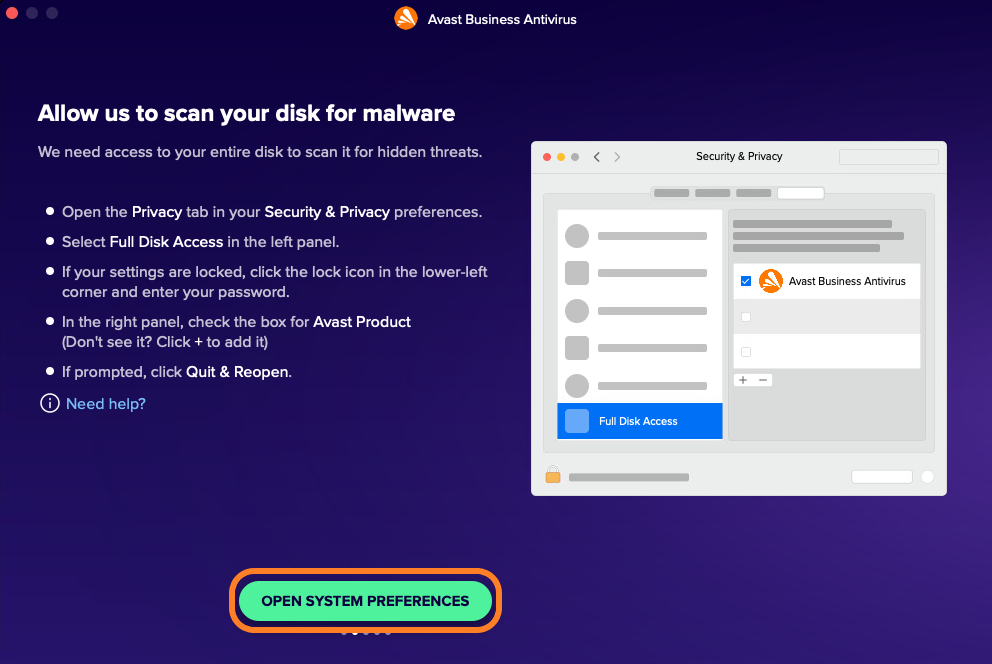
- Go to the Privacy tab
- Select Full Disk Access in the left panel
- In the right panel, tick the checkbox next to Avast Business Antivirus (if it's not listed here, add it using the plus sign at the bottom of the list)
If your settings are locked, click the lock icon in the bottom left corner, enter your admin credentials, then click Unlock.
- If prompted, click Quit & Reopen
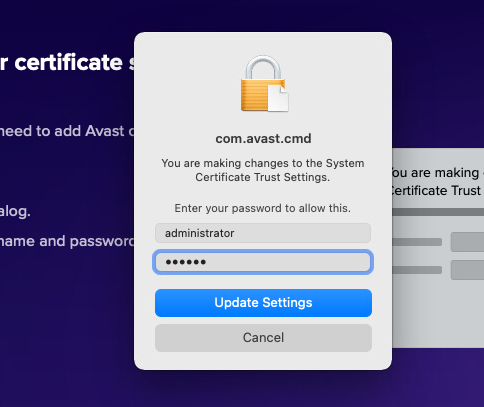
Updating Certificate Settings
Avast certificates need to be added to your Keychain so that various browser threats can be identified and stopped. If the certificate settings haven't been updated during the installation, you will need to update them now:
- Click Open Confirmation Dialog
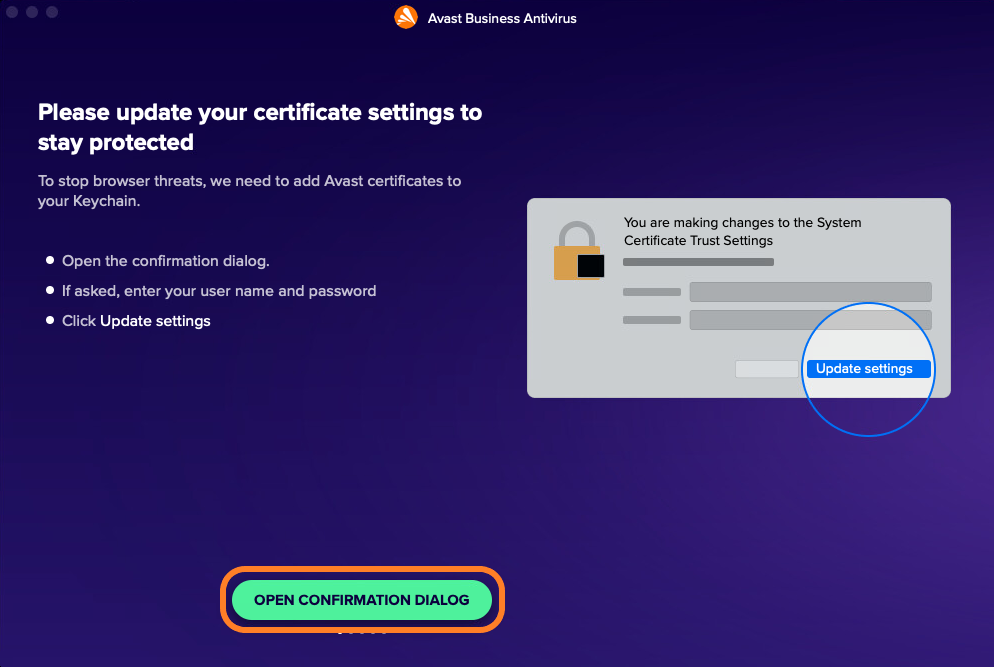
- Enter your admin credentials
- Click Update settings
Other Articles In This Section:
Adding Devices to Business Hub
Removing Devices From Business Hub
Network Discovery and Remote Deployment
Command-Line Installation Parameters
Deploying on Windows Using Group Policy Object
Related Articles: