PROXIMANOVA-LIGHT.OTF PROXIMANOVA-LIGHTIT.OTF PROXIMANOVA-EXTRABLD.OTF PROXIMANOVA-BOLD.OTFPROXIMANOVA-BLACK.OTF
Get this font in here!
This Article Applies to:
- Avast Business CloudCare
IMPORTANT: The CloudCare console does not support opening multiple tabs in the same browser session. Please use multiple browsers or incognito mode instead.
The Cloud Backup Service allows partners to back up their customers' individual files or capture an image of an entire disk. Backup plans are available at as little as 25 GB up to 1024 GB with an optional automatic upgrade plan in increments of 25 GB. This service will perform incremental backups after initial backup on a scheduled basis. During the setup of this service, a 30-day trial may be offered. Currently, this service can only be billed on a monthly basis.
This service is only available to partners, but self-managed users can still view the settings in the policy.
To access Cloud Backup settings in the console, navigate to the Policies tab, then expand the Cloud Backup section (under Data Protection).
When using the policy or the default file and folder backup on the client, there are no retention rules; therefore, the backed up data is retained indefinitely. This means that partners must monitor the data/data usage to ensure that the correct data is retained, as when data is deleted or moved to another location on the disk after it has been backed up, it will still be stored in the cloud.
To utilize retention rules, partners can configure the advanced backups in the local backup client (see Backup Client Behavior in Cloud Backup).
When backing up multiple versions of a file, partners will only be billed for the largest version.
Specifying Data to Back Up
Under the Select Files tab of the Cloud Backup settings, you can choose the files and folders to back up. Choose the specific types of files to back up by ticking the checkbox next to each file type.
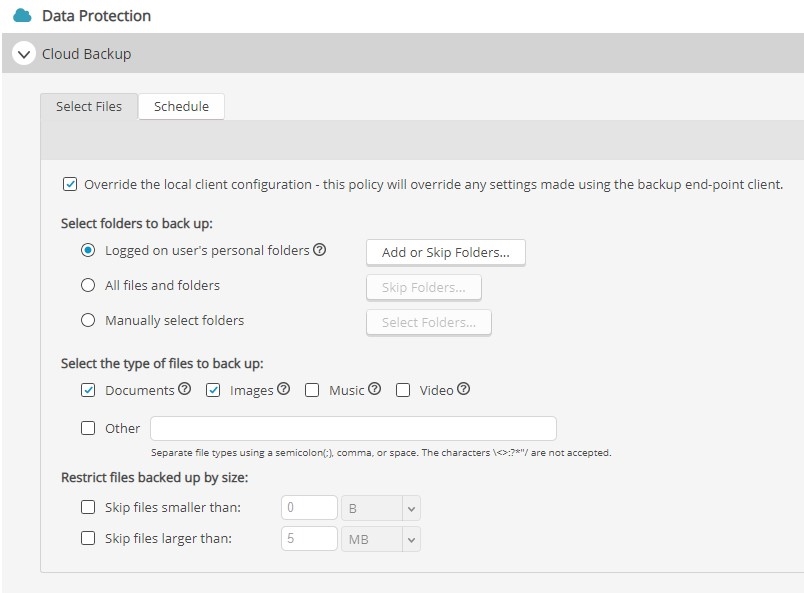
Cloud Backup is enabled by default, but the Override the local client configuration - this policy will override any settings using the backup end-point client option must be ticked for the policy to override the end-point client settings.
Selecting Folders to Back Up
- Logged on user's personal folders: will include Documents, Desktop, Favorites, Music, Pictures, and Videos. This option excludes the following directories by default:
- C:\Program Files
- C:\Program Files (x86)
- C:\Windows
- InternetCache
- %Temp% (system temporary directory)
- %Recycle%
- Client installation folder
- Client Cache folder
- Client Temp folder
- Client Packages folder
- Client Logs folders
- To back up any of these directories, you must select the manually select folders option when selecting the folders to back up.
- All files and folders: will include everything except directories added to the Skip Folders list. To add to this list, click Skip Folders, enter the exact path and press the plus sign, then click Ok
- Manually select folders: will only include the directories added to the Select Folders list. To add to this list, click Select Folders, enter the exact path and press the plus sign, then click Ok
Selecting Files to Back Up
Specifying File Types
The Select the type of files to back up configuration is only necessary if you chose Logged on user's personal folders or All files and folders in the previous section. You can choose to back up any or all of the following file types: Documents, Images, Music, Video, and Custom.
 Supported File Types
- Documents: abd, accdb, adr, chm, csv, dbx, dic, dif, djvu, doc, dochtml, docm, docmhtml, docx, docxml, dot, dotx, dotxml, dpx, eml, exc, fad, fdf, fphtml, gdb, gra, grd, hcx, htm, html, ibank, keynote, mapimail, mbx, mda, mdb, mde, msf, msg, nick, nkz, npc, numbers, oab, odb, odf, odp, ods, odt, one, ost, pab, pages, pce,pdf, pot, potm, potx, ppa, pps, ppsx, ppt, pptm, pptx, pst, qba, qbb, qbw, qdb, qdf, qdt, qel, qif, qmd, qph, qpw, qsd, qtx, rtf, rwz, scp, sxc, sxi, sxw, t04, t05, t06, t07, t08, t09, tax, tdb, toc, txt, url, wab, wdb, webbookmark, webloc, wks, wpd, wps, wtx, xlr, xls, xlsb, xlsm, xlsx, xlt, xltm, xltx, xlw, xml
- Images: ai ,bmp, cr2,crw, dib, dng, emf, fppiclib, gif, icl,icns, icon, jfif,jp2, jpe,jpeg, jpg, mac, mrw, nef, odg, pct, pcx, pdp, pef, pic, pict, png, pnt, pntd, psd, pspimage, qti, qtif, rle, svg, tga, tif, tiff, wdp, wmd, wmf, xcf
- Music: aa3, aac, acm ,afc, aif, aifc, aiff, amr, ape, at3, au, cda, emp, emx, flac, gpx, iff, m4a, m4b, m4p, m4r, mid, midi, mp3, mpa, nmw, oga, ogg, rmi, snd, wav, wm, wma, wmx, wpl, wvx
- Videos: 3g2, 3gp, asf, asx, avi, divx, dvr-ms, f4v, flv, m2v, m4v, mfp, mkv, mlv, mod, mov, mp2, mp2v, mp4, mpe, mpeg, mpeg4, mpg, mpv2, msdvd, mswmm, ogv, qt, ram, rm, rmvb, spd, swf, vob, wmv, xvid
- Custom: specify any extensions for priority backup manually. Separate by a white space, semicolon, or comma. Wildcards are not accepted.
Specifying File Size
The Restrict files backed up by size configuration is only necessary if you chose Logged on user's personal folders or All files and folders. You can choose to skip files smaller than a chosen size (0 bytes, for example) and/or skip files larger than a chosen size (5 megabytes, for example). The file size options in the drop-down menus are B, KB, MB, GB, and TB.
Policy changes will not take effect until the next scheduled backup occurs. Use the Backup Now option in the Device Details section or from the endpoint client to force policy changes to take effect immediately.
Scheduling Backups
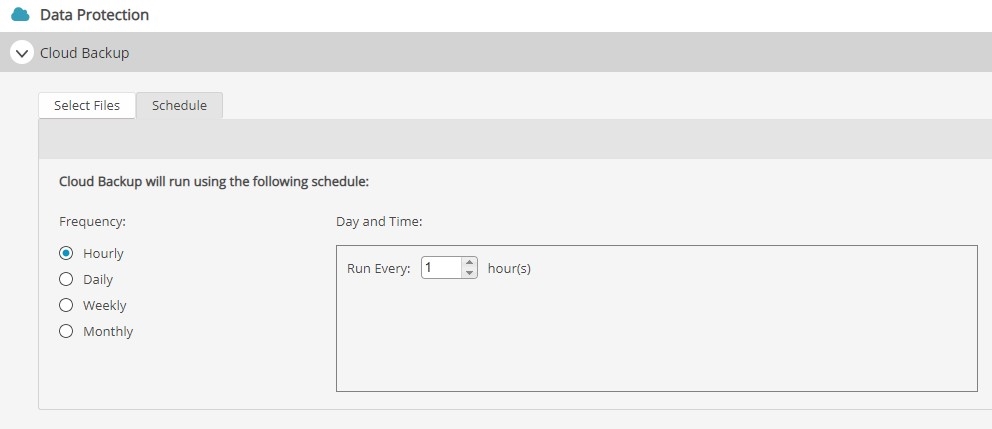
Under the Schedule tab of the Cloud Backup settings, you can configure the frequency of automatic backups:
- Hourly will run a backup every x number of hours. You can enter the number of hours between backups in the Day and Time box
- If the Hourly option is selected during setup, the initial backup will start on the next hour.
- Daily will run a backup every day. You can select the start time and end time, which can be either until interrupted/finished or until a specific time, in the Day and Time box
- Weekly will run a backup every week on a specific day. You can select the day of the week, as well as the start and end time, which can be either until interrupted/finished or until a specific time, in the Day and Time box
- Monthly will run a backup every month on a specific numerical day of the month. You can select the day of the month, as well as the start and end time, which can be either until interrupted/finished or until a specific time, in the Day and Time box.
- For monthly backups, we do not recommend selecting the 29th, 30th or 31st day of the month for the backup, as these dates do not occur every single month.
After you have configured all Cloud Backup settings to your liking, click Save & Apply to Devices/Customers in the top right.
Once the backup is performed, you will be able to view and restore backed up data when needed by following the instructions laid out in
Other Articles In This Section:
Related Articles: