PROXIMANOVA-LIGHT.OTF PROXIMANOVA-LIGHTIT.OTF PROXIMANOVA-EXTRABLD.OTF PROXIMANOVA-BOLD.OTFPROXIMANOVA-BLACK.OTF
Get this font in here!
This Article Applies to:
- Avast Business CloudCare
IMPORTANT: The CloudCare console does not support opening multiple tabs in the same browser session. Please use multiple browsers or incognito mode instead.
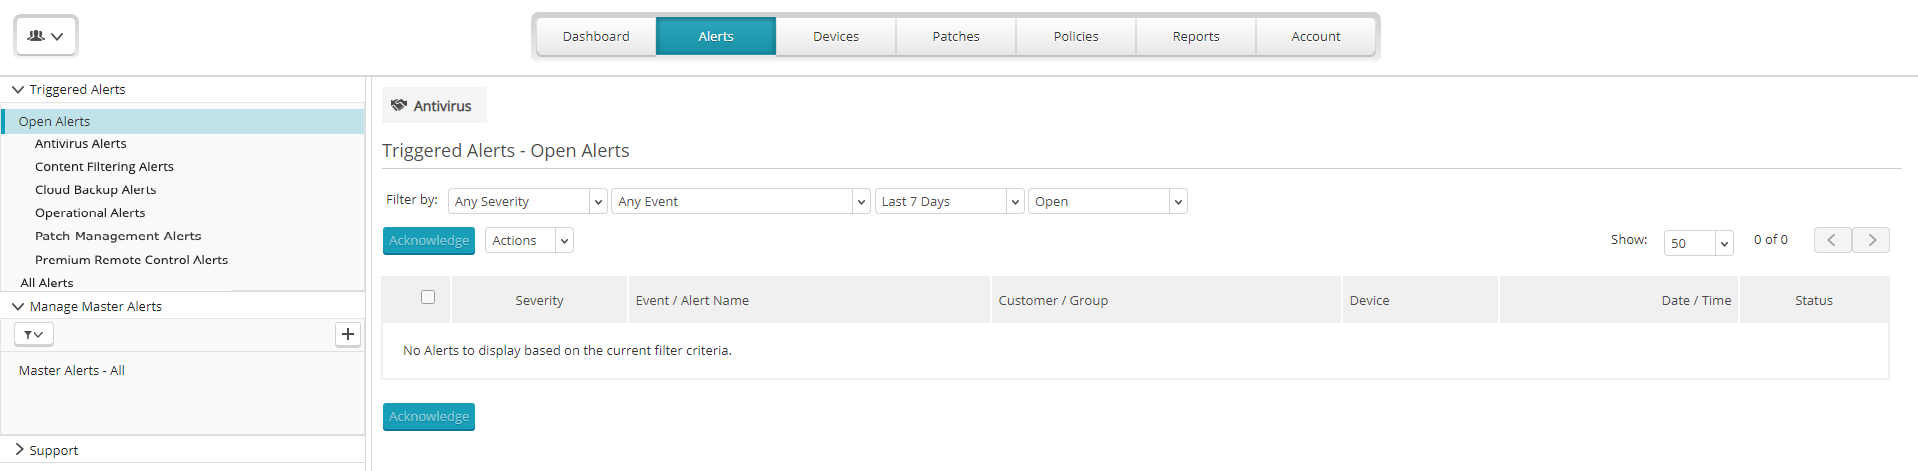
Alerts are system or network events that warrant an immediate warning. This tab allows you to view the details about every alert generated within the last three months. The table shows all recent alerts sorted by Date and Time but can be sorted by any of the available filter options in the filter by drop-down menus.
Alerts
At the Partner level, you can filter alerts by their type, such as Antivirus or Patch Management alerts.
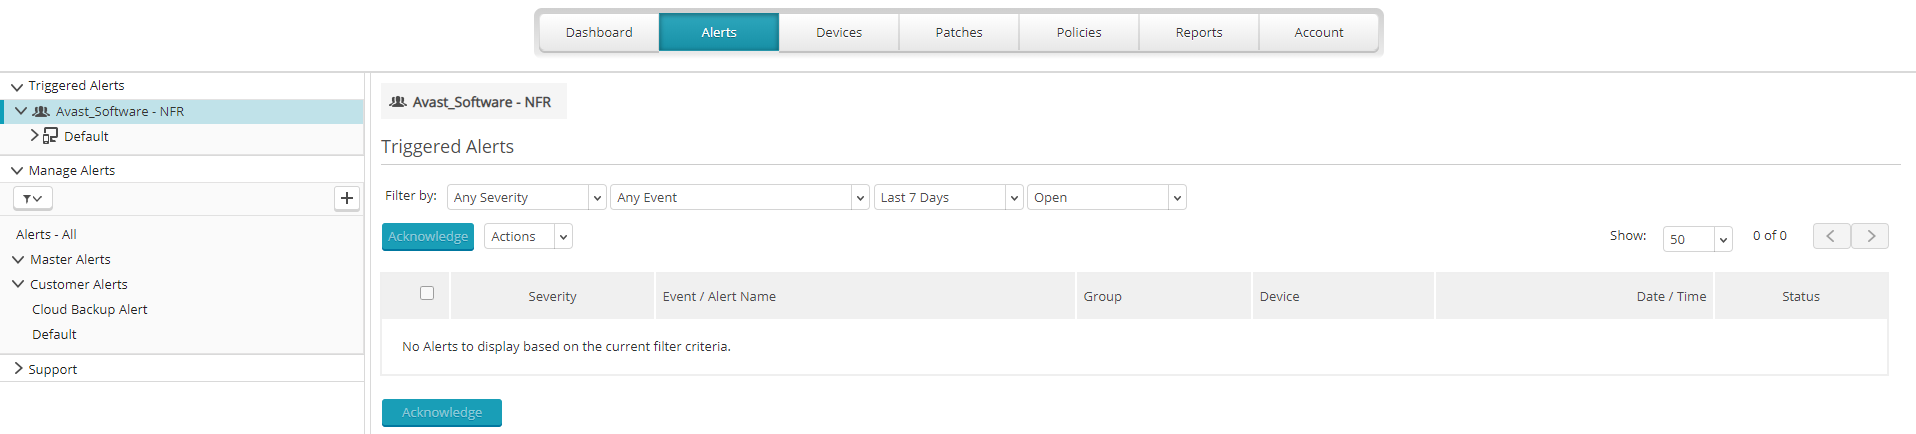
At the customer level, you can filter alerts by device group.
Actions for Alerts
- You can click the arrow to expand a row and view more information about an event
- A threat detected event provides a shortcut to the Virus Chest, where you can take action on quarantined items
- You can select an alert and click Acknowledge to clear the alert and remove it from the default view of the open triggered alerts list
Managing Master and Customer Alerts
You can add or remove alerts and manage the active status of each alert. Refer to the Event Table for detailed information about each possible event. Once alerts are configured, the heat map on the Dashboard will be able to display triggered alerts across your network.
Adding Master Alerts (Partners Only)
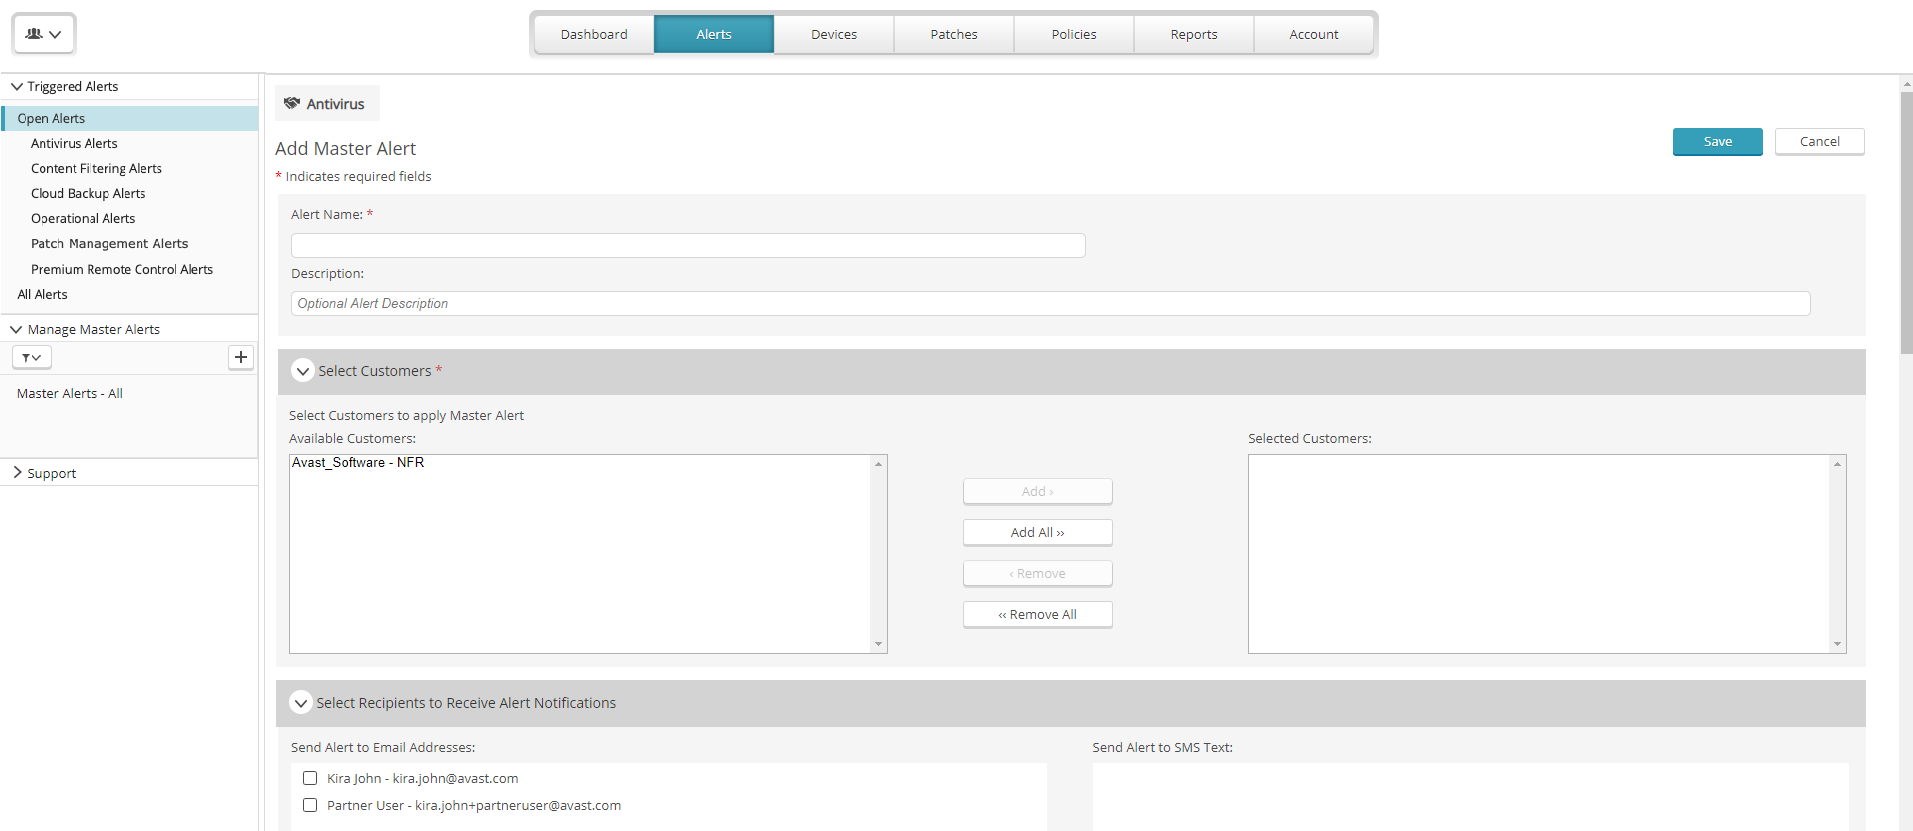
- From the Alerts tab, click the plus sign in the left-side navigation pane to Add Master Alert
- Type a name for the alert, and optionally type a description of the alert
- Select customers to apply the Master Alert to by selecting the customer name from the left-hand pane and clicking Add. You can also add all customers by clicking Add All. You can remove customers by clicking their names in the right-hand pane and clicking Remove, or remove all customers by clicking Remove All
- In the Select Devices to Watch section, select an entire customer and all their groups and devices, or choose specific device groups. You can select specific devices within groups by clicking Select Devices beside the group name
- The Show All Selected Devices button displays a list of all device names included in your selection(s)
- If desired, you can send email or SMS alert notifications. You can select check boxes for users with information already in the portal, or manually add recipients by entering their name, email address or phone number, and potentially their mobile provider if sending via SMS
- In the Select Events to Watch section, determine which events will trigger the alert
- You can select All Events by checking the box at the top of the table, and/or choose any of the services listed to watch for events related to those services
- You can select specific events by checking the box beside them in the table
- If you would like to automatically acknowledge alerts when the triggering event is resolved, for instance by updating the virus definitions, click the slider beside Automatically acknowledge alerts when resolved
- You can also notify the recipients in the email/SMS list when an alert is automatically resolved by checking the box
- Click Save
Adding Alerts

- From the Alerts tab, click the plus sign in the left-side navigation pane to Add Alert
- Type a name for the alert, and optionally type a description of the alert
- In the Select Devices to Watch section, select an entire customer and all their groups and devices, or choose specific device groups. You can select specific devices within groups by clicking Select Devices beside the group name
- The Show All Selected Devices button displays a list of all device names included in your selection(s)
- If desired, you can send email or SMS alert notifications. You can select check boxes for users with information already in the portal, or manually add recipients by entering their name, email address or phone number, and potentially their mobile provider if sending via SMS
- In the Select Events to Watch section, determine which events will trigger the alert
- You can select All Events by checking the box at the top of the table, and/or choose any of the services listed to watch for events related to those services
- You can select specific events by checking the box beside them in the table
- If you would like to automatically acknowledge alerts when the triggering event is resolved, for instance by updating the virus definitions, click the slider beside Automatically acknowledge alerts when resolved
- You can also notify the recipients in the email/SMS list when an alert is automatically resolved by checking the box
- Click Save
Acknowledging Alerts
Manually: From the Alerts tab, tick the alerts you wish to clear, then click Acknowledge.
Automatically: From the Alerts tab, scroll to the Select Events to Watch section. Use the Automatically acknowledge alerts when resolved toggle to enable or disable this feature. Alerts currently supported by auto-acknowledge are:
- Out-of-date Virus Definitions
- Backup Failed
- Device Needs Restart
- Antivirus Protection Disabled
- Virus Scan Overdue
- Backup Overdue
- Patch Deployment Overdue
- Patch Scan Overdue
Activating or Deactivating an Alert
Master Alerts: From the Alerts tab, expand Manage Master Alerts. Select Master Alerts - All. Click Activate or Deactivate next to the Alert.
Customer Alerts: From the Alerts tab, expand Manage Alerts. Select Alerts - All. Click Activate or Deactivate next to the Alert.
Other Articles In This Section:
Related Articles: