PROXIMANOVA-LIGHT.OTF PROXIMANOVA-LIGHTIT.OTF PROXIMANOVA-EXTRABLD.OTF PROXIMANOVA-BOLD.OTFPROXIMANOVA-BLACK.OTF
Get this font in here!
This Article Applies to:
- Avast Business CloudCare
IMPORTANT: The CloudCare console does not support opening multiple tabs in the same browser session. Please use multiple browsers or incognito mode instead.
Once your devices have been scanned for missing patches, any supported patches that have not yet been installed will be displayed on the Patches page of your console. You can then deploy these patches manually (ad hoc) or set up automatic patch deployment. Note that some patches can take hours to deploy, particularly if a patch is large and/or if you host a large number of devices in your network.
A system reboot is often needed upon installing Antivirus updates or patches. To ensure that the devices in your network are restarted whenever a service requires such action, enable required restarts in your policy settings. For more information, see
If needed, you can omit certain patches from being deployed by ignoring them manually (see
To download the up-to-date list of all supported patches, click here.
Note that Patch Management does not support Microsoft ESU patches.
Enabling/Disabling Automatic Patch Deployment
To enable or disable automatic deployment of missing patches:
- Go to the Policies page (at partner level for master policies or customer level for customer policies)
- Select the desired policy from the left-hand pane
- Under Endpoint Protection, expand the Patch Management section
- Go to the Patch Settings tab
- Under Patch Deployment, choose one of the following:
- Do not deploy patches: Select this option if you want patches to be deployed manually instead of automatically (see Deploying Patches Manually for further instructions).
- Deploy approved patches immediately after scan: Select this option if you want patches to be deployed automatically as soon as the patch scan completes (note that the patches might first go into the Scheduled status before being downloaded and installed).
- This option uses auto-approval rules (see Approving Patches) as well as any manual approvals done via the Patches page.
- Deploy approved patches later: Select this option if you want patch deployment to run automatically on a schedule (then choose between daily, weekly, or monthly frequency, and define the time of day you would like the deployment to take place).
- This option also uses auto-approval rules/manual approvals.
- If you decide on monthly installations, please ensure the day of the month you have chosen occurs every month (for example, do not choose the 31st day of the month unless you specifically want to skip installing on months without 31 days).
- Save your changes
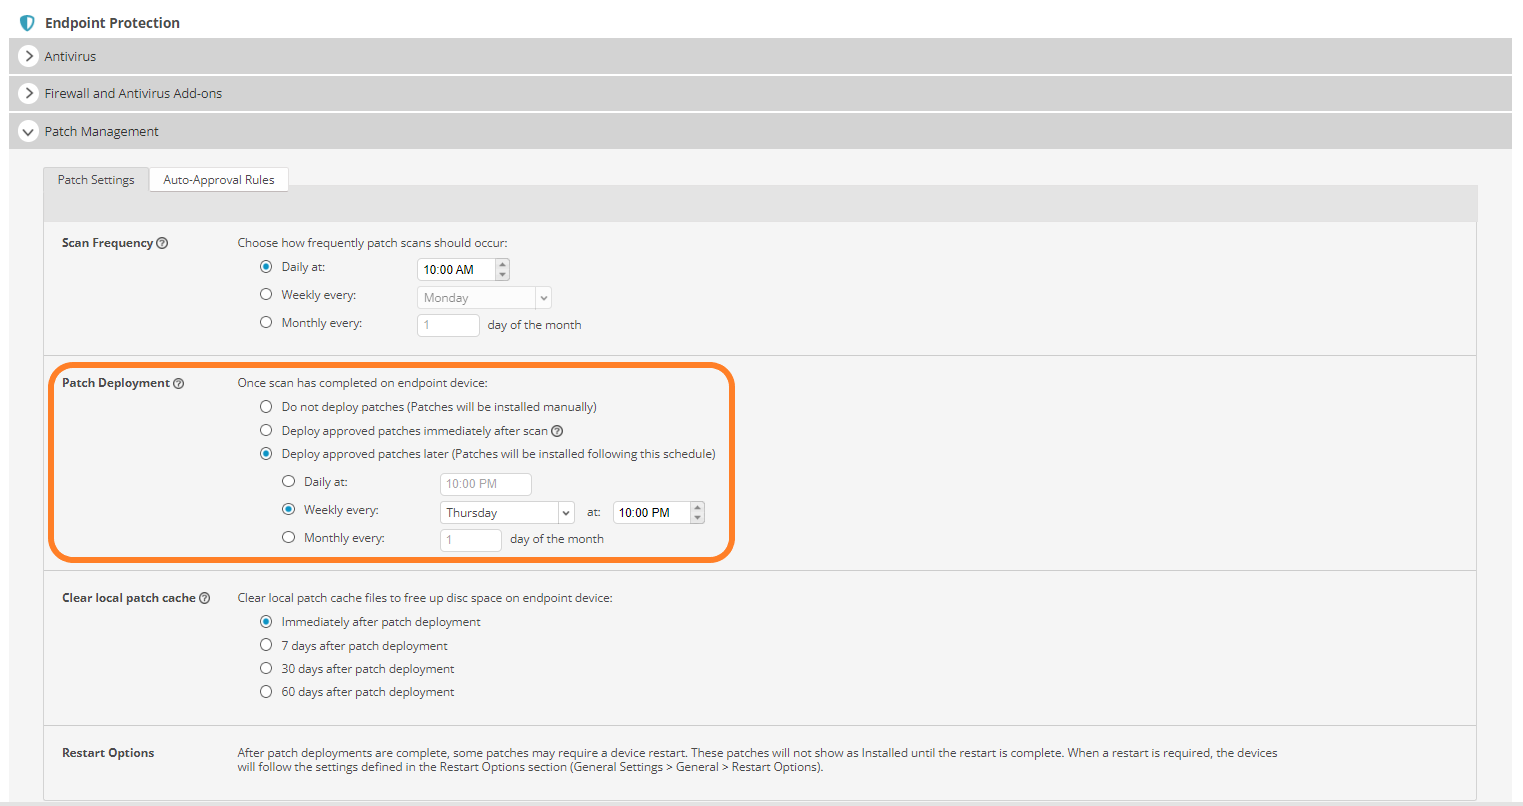
It is recommended you configure patch deployment to occur right after patch scanning (second option) so any missing patches are deployed as soon as possible.
If you are using an Update Agent, that device will be used to store application and OS patches and will distribute them to devices in your network (same as with program and virus definitions updates).
To learn more about the differences between the two patch deployment methods, see Automatic vs. Ad Hoc Patching.
Approving Patches
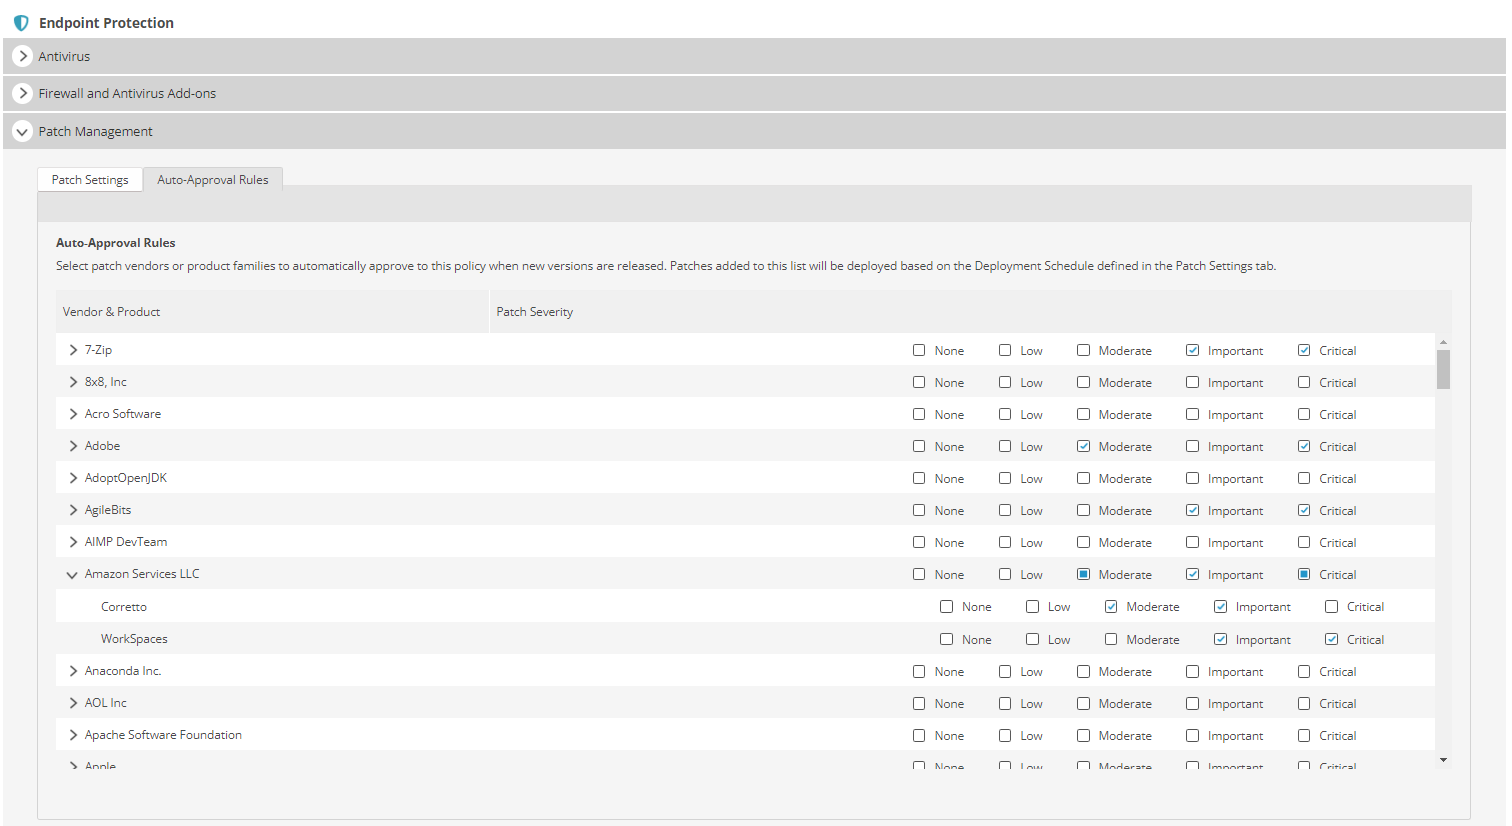
Patches will not be automatically deployed unless they are approved. To set up automatic approvals of patch installations:
- Go to the Policies page (at partner level for master policies or customer level for customer policies)
- Select the desired policy from the left-hand pane
- Under Endpoint Protection, expand the Patch Management section
- Go to the Auto-Approval Rules tab
- Select the patches that will be auto-approved according to vendor/product and severity.
- If you tick a checkbox next to a vendor name, the rule will apply to all products from that vendor. To apply the rule to specific products only, expand the vendor, then tick the checkboxes next to those products.
- Save your changes
Deploying Patches Manually
If you have decided to deploy missing patches manually, you can do so from either the All Patches or the Patches by Device section of the Patches page.
Deploying via All Patches Section
To deploy patches to one or more devices:
- Go to the Patches page (at customer level)
- Ensure All Patches is selected in the left-hand pane

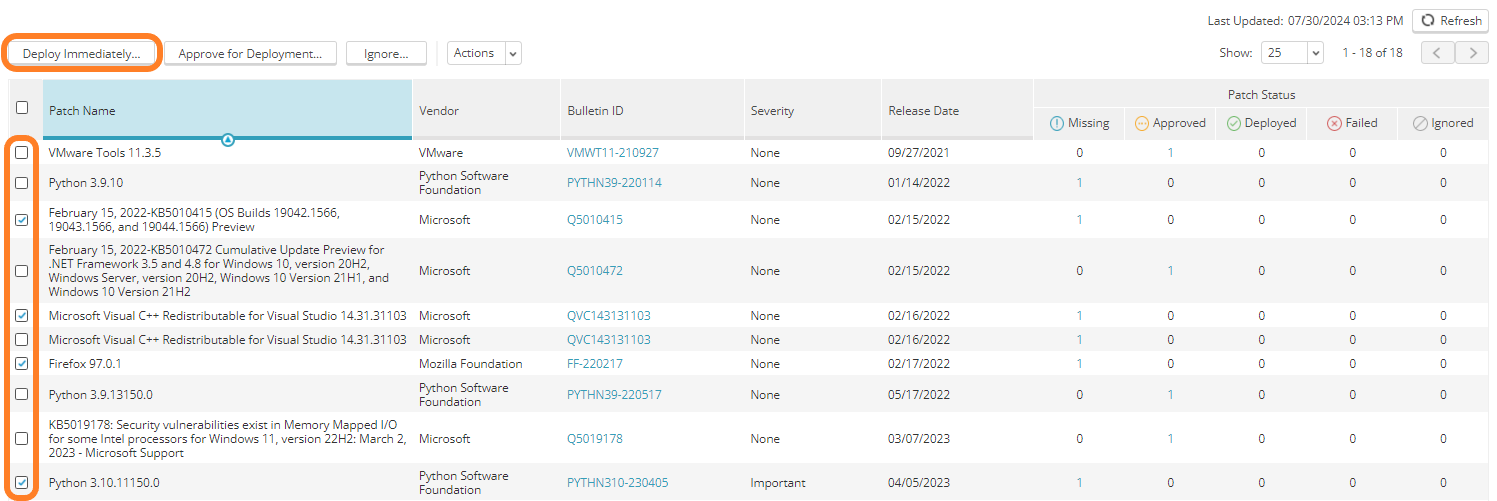
- Tick the checkbox(es) next to the patch(es) you want to deploy (you can use the available filtering options to locate the patch(es) more easily)
- Click the Deploy Immediately... button above the list
- Select the devices to which the selected patches should be deployed, then click Deploy
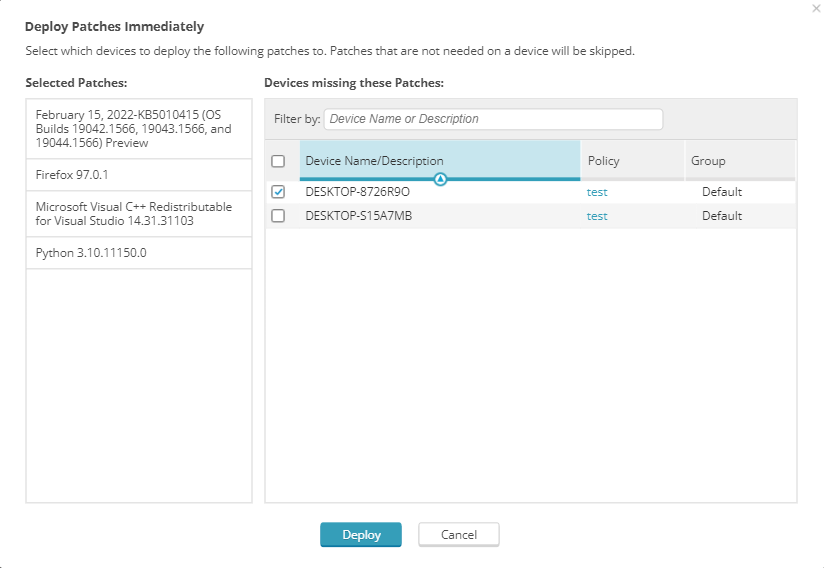
- Review your selections, then click Deploy again to confirm the action
- Patches that are not needed on a device will be skipped.
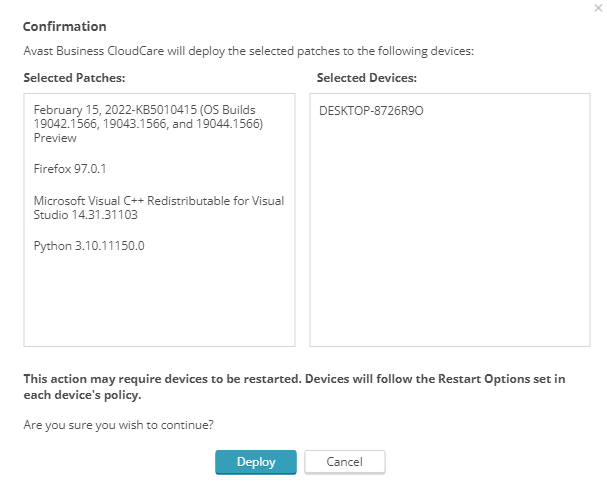
Wait while the patch deployment command runs on the target device(s). Successfully deployed patches will be displayed in the All Patches and Patches by Device sections of the Patches page.
Deploying via Patches by Device Section
To deploy patches to a single device:
- Go to the Patches page (at customer level)
- Select Patches by Device in the left-hand pane

- Select the device to which you want to deploy patches
- Tick the checkbox(es) next to the patch(es) you want to deploy (you can use the available filtering options to locate the patch(es) more easily)
- Click the Deploy Immediately... button above the list

- Review your selections, then click Deploy
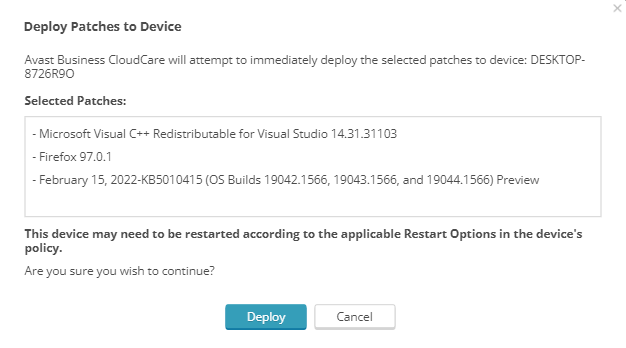
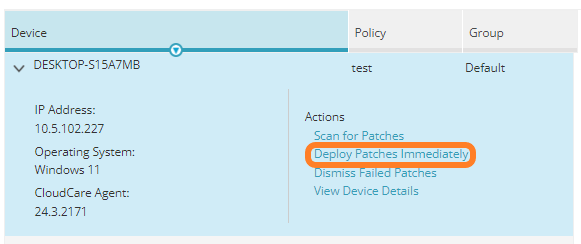
If you want to deploy all available patches to the selected device, you can also use the Deploy Patches Immediately option in the Actions section of that device (visible when the device is expanded).
To deploy all available patches to all devices in the customer's network, use the Deploy all Patches button in the top right corner of the page.
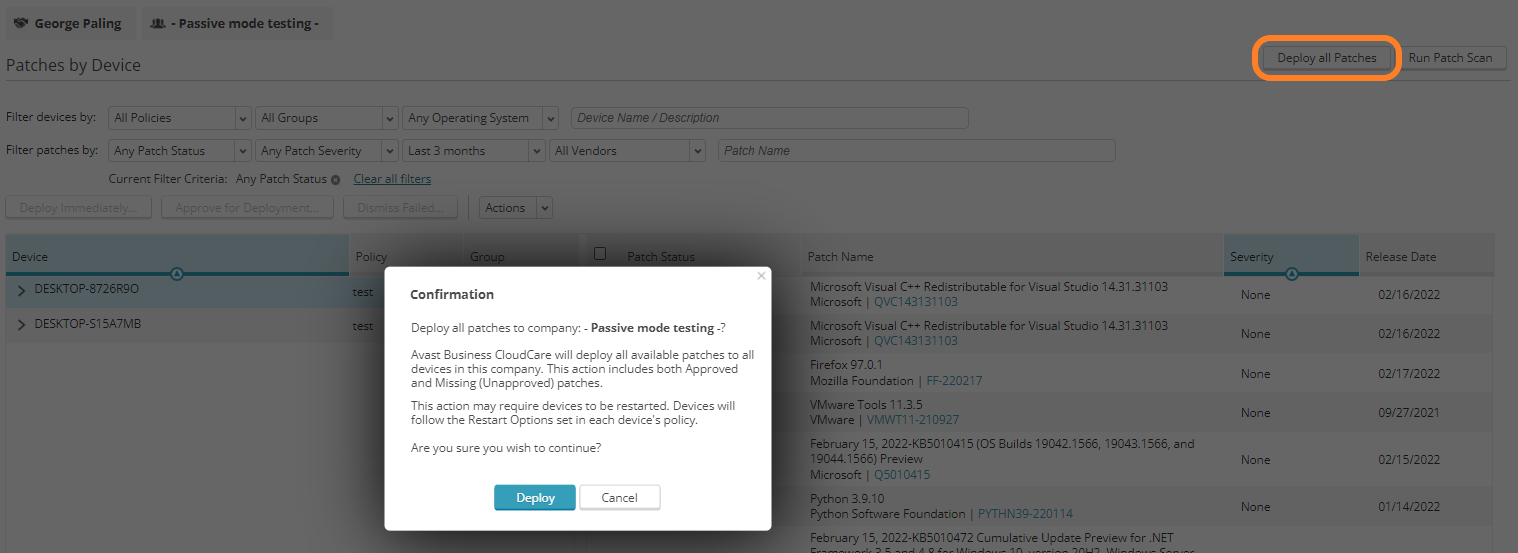
Wait while the patch deployment command runs on the target device(s). Successfully deployed patches will be displayed in the All Patches and Patches by Device sections of the Patches page.
Other Articles In This Section:
Scanning Devices for Missing Patches
Related Articles: