PROXIMANOVA-LIGHT.OTF PROXIMANOVA-LIGHTIT.OTF PROXIMANOVA-EXTRABLD.OTF PROXIMANOVA-BOLD.OTFPROXIMANOVA-BLACK.OTF
Get this font in here!
This Article Applies to:
- Avast Small Business Solutions
- Avast Small Office Protection
- Avast Business Antivirus
- Avast Business Antivirus Pro
- Avast Business Antivirus Pro Plus
- Avast Business CloudCare Antivirus
File Shield is the main layer of Antivirus active protection. It scans programs and files saved on the device for malicious threats as they are opened, run, modified, and saved. File Shield is designed to prevent any detected malware from infecting the system.
We strongly recommend you always keep this shield turned on and only make configuration changes if you have an advanced understanding of malware protection principles.
File Shield is part of the Core Shields of the Avast Business client.
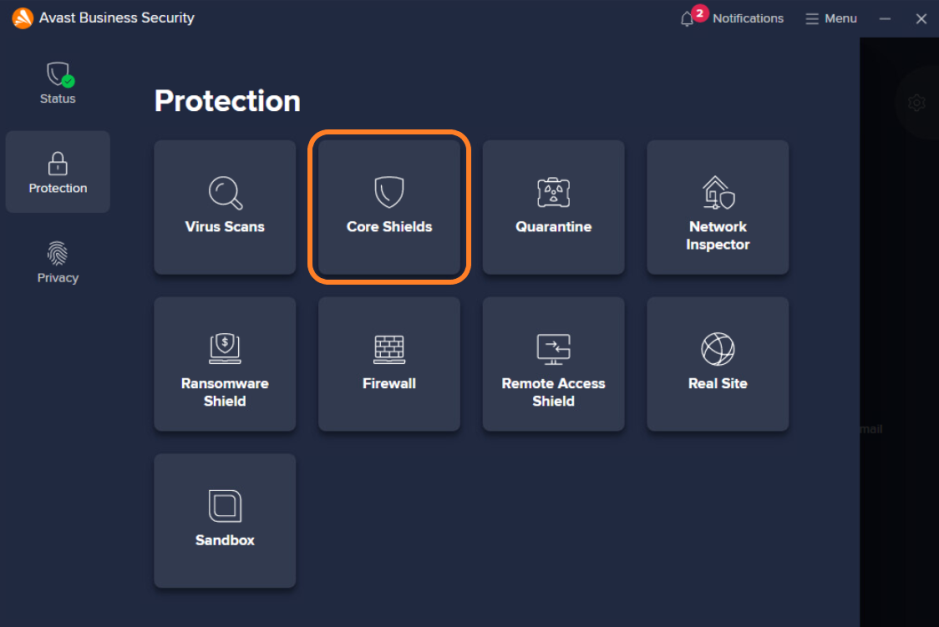
From Protection > Core Shields, you can enable/disable this component using the dedicated toggle.
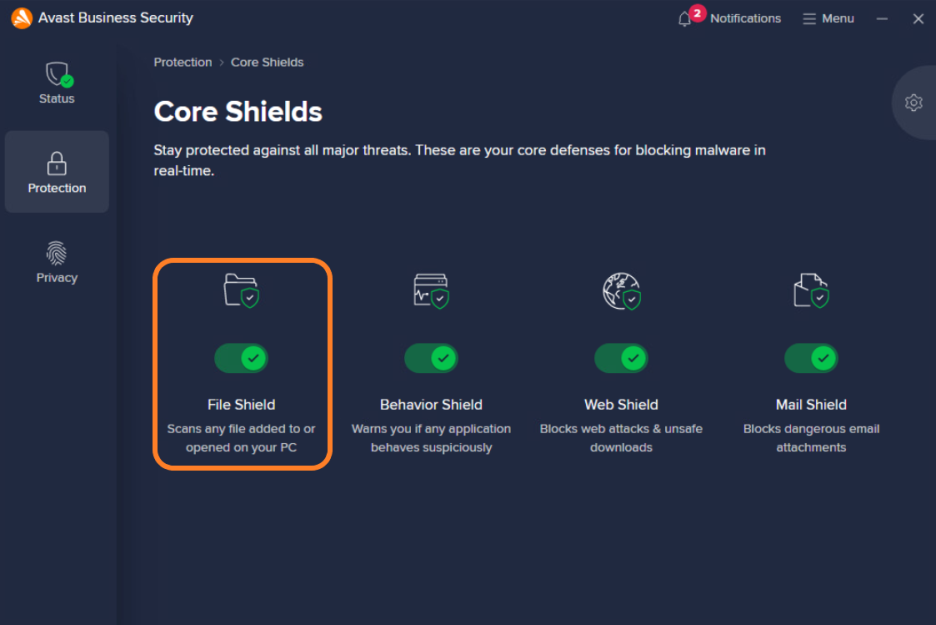
Note that it is not possible to individually enable/disable File Shield in managed devices - only all core shields can be disabled/enabled at once from the Advanced Settings. Unmanaged devices have free control over disabling/enabling these shields.
Configuring File Shield Settings
Advanced File Shield settings can be accessed by either clicking the gear icon on the
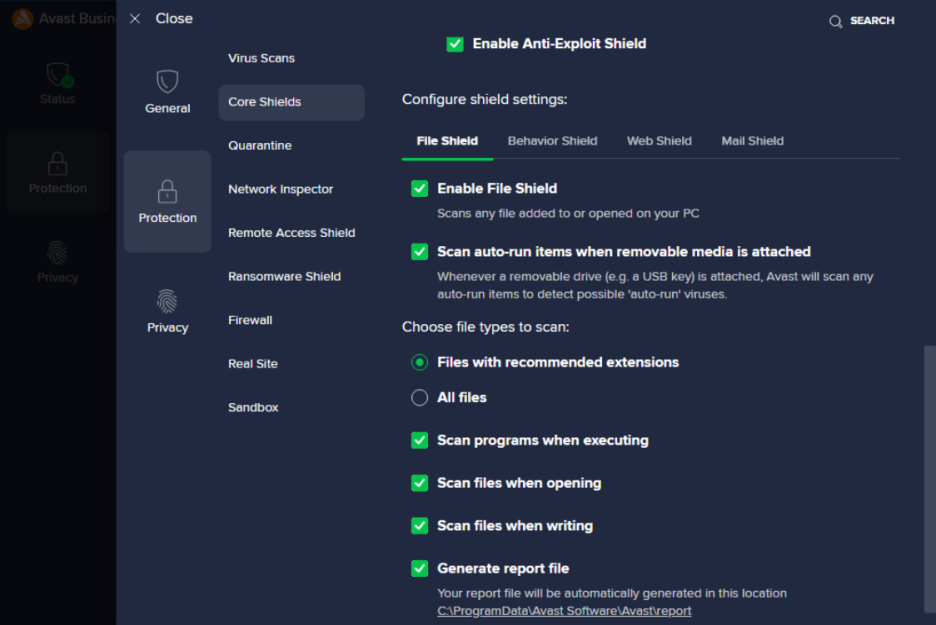
The following options are available here:
-
- Scan auto-run items when removable media is attached: When a removable drive is plugged to the device, File Shield will scan any auto-run items to protect against auto-run viruses
- Choose types of files to scan: Files with recommended extension (internal list maintained by Avast development of the highest risk file types) or All files (all file types)
- The selection here will have an impact on performance - all files being scanned will take more time, and more system resources
- Scan programs when executing: Scans programs, scripts, and libraries each time they are run
- Scan files when opening: Scans each time a file is opened
- Scan file when writing: Scans when files are being created or modified
- Generate report file: Logs the actions of the File Shield in
C:\ProgramData\Avast Software\Avast\report
At the top of the Core Shields screen, you can also configure some general settings such as scan sensitivity and response to malware detections, as well as enable additional features like CyberCapture or Hardened Mode. Note that these settings apply to all Core Shields. For more information, see Core Shields Settings.
Additional Geek Area Settings
Within the Geek Area, there are several further settings for
- Go to Menu, then select Settings
- Click Search in the top right corner
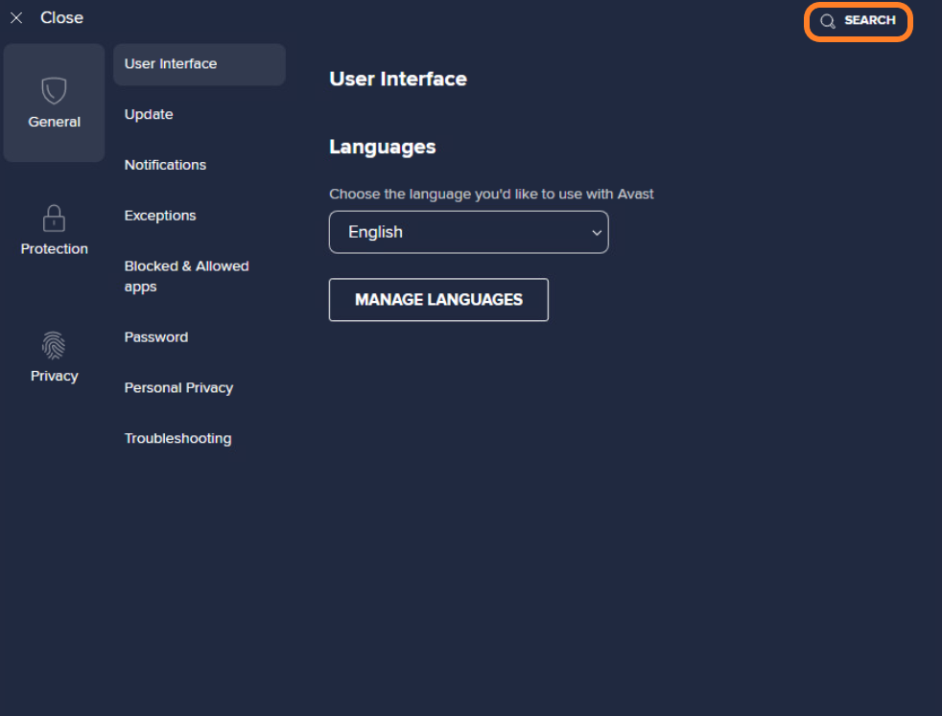
- Type geek:area in the search field, then hit Enter
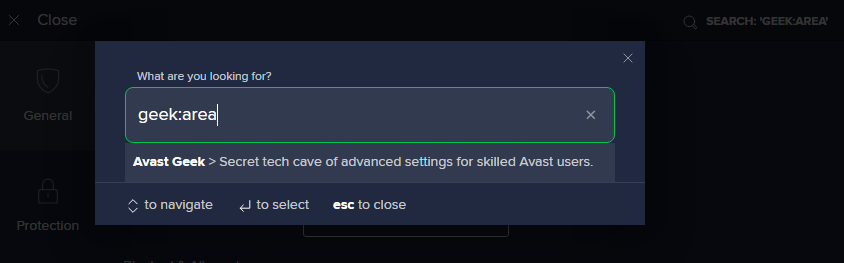
- Scroll down to the File Shield section
There are four detection types you can configure here:
- Action to be performed when a virus is found
- Action to be performed when a potentially unwanted program is found
- Action to be performed when a potentially unwanted tool is found
- Action to be performed when a suspicious object is found
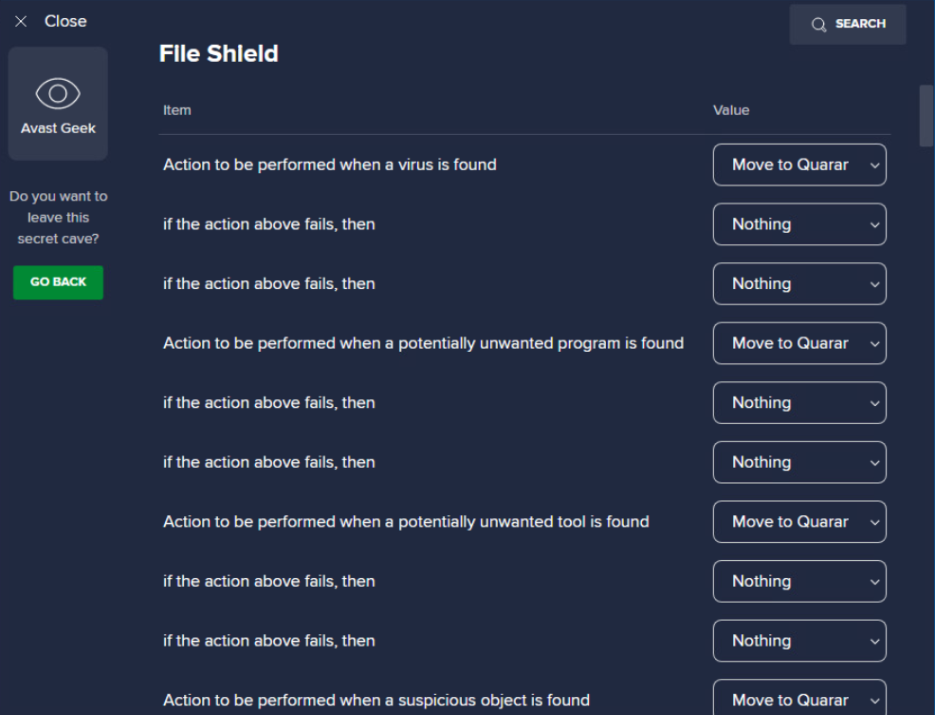
For each type, it is possible to configure three actions to perform, with the "if the action above fails, then" value. The following actions can be selected from each drop-down menu:
- Fix automatically: Runs a sequence of actions (repair file; if not possible, then move to Quarantine; if not possible, then delete)
- Move to Quarantine: Sends the threat to Quarantine, where it cannot harm your system
- Repair: Removes only malicious code attached to an otherwise safe file — this is not possible for files that are entirely malware
- Abort connection: If Avast detects that you are connected to a URL, game, or device that contains malware, the connection is stopped automatically
- Ask: Avast asks what you want to do with a detected threat before any action is taken
- Delete: Permanently remove the file from your computer
- Nothing: No action is taken during the scan; the threat is listed in your scan results and you can decide what to do later
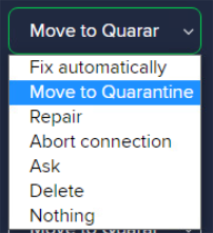
For example, you can set the first action to Move to Quarantine. If that fails, then Ask the user. If that then fails as well, the final action can be to Delete the file. If the final action also fails, nothing further will be performed (file will continue to be blocked).
Apart from these options, you can define whether File Shield will:
- Show a notification window when action is taken: Choose whether a notification is displayed each time File Shield detects a threat on the device
- Enable Antimalware Scan Interface (AMSI) scanner: This allows the user to disable/enable the AMSI integration
- AMSI is a feature in Windows 10 and newer operating systems that allows the antivirus to have some close integration with the OS to enhance detection capabilities. More on AMSI can be found in this Microsoft article.

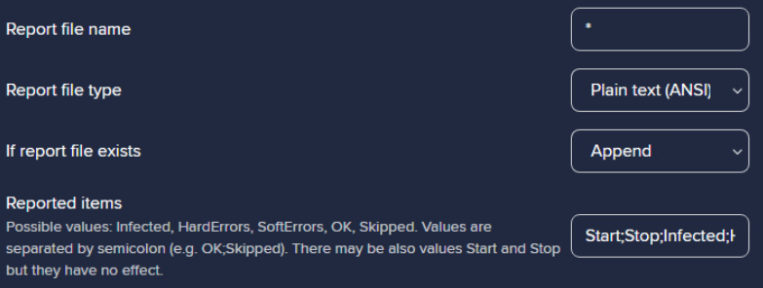
It is also possible to configure the report file here in order to enhance the reporting of the shield:
- Report file name: Enter a name for the report file (default * will use the default file name)
- The Generate report file checkbox needs to be ticked for the report file to be created.
- Report file type: Select the format of the report file:
- Plain text (ANSI)
- Plain text (Unicode)
- XML
- If
- Using the Append option will gradually increase the size of the report file on the disk. Including informative events such as OK will also greatly increase the size on the disk as every clean file will be reported.
- Reported items: Define which events appear in report files
- Infected — Files and areas of the scanned environment that the virus scan identifies as containing malware
- OK — Files and areas that the virus scan identified as being clean
- Skipped — Files and areas that the virus scan did not check because of the scan settings
Adding File Shield Exceptions
If needed, you can add exceptions to the File Shield scans through the Exceptions tab of the Settings > General section. This can speed up the scans and prevent false-positive detections. For detailed instructions, see
FAQ
 Why can't I disable File Shield individually in a managed Antivirus client?
The managed endpoints are designed to be controlled from the policies, therefore the important shields are inaccessible from the UI to be disabled individually. Core Shields can only be disabled together.
Why are the Core Shields actions values blank, usually in managed devices?
The local Antivirus is simplified with its controls in the UI. The user can only control all shield settings from these toggles at once, rather than individual settings for each shield.
We have the advanced controls in our managed policies to be able to configure each shield individually, which overwrites the local client settings, leading to these options being empty. The same can be performed from the Geek Area in the local client.
They are still configured correctly, they simply are not visible in the local client UI.
What actions should I choose for handling the detections?
It depends on how you want to handle the detections - it can be simple to use the Fix automatically feature, however, the final action in that sequence is Delete, therefore it may not be desirable in cases of false positives. Move to Quarantine is a safe option to allow potential restoration in the future.
How do I stop the user from disabling File Shield?
Enable the password protection of the UI (locally in unmanaged, from the policies in managed) in order to prevent the local user disabling shields.
Application is not able to run with File Shield enabled, what can I do?
Add the application as an exclusion either in the global or File Shield specific exclusions. Verify if there are any potentially conflicting applications (e.g. another antivirus) running on the system and remove it if found.