PROXIMANOVA-LIGHT.OTF PROXIMANOVA-LIGHTIT.OTF PROXIMANOVA-EXTRABLD.OTF PROXIMANOVA-BOLD.OTFPROXIMANOVA-BLACK.OTF
Get this font in here!
This Article Applies to:
- Avast Business Hub
The Users page of the Avast Business Hub enables you to view, edit, suspend, and remove your existing users, as well as invite new users as console administrators or viewers. Administrators have full control over the settings and features in the console, while viewers' permissions are fairly limited (see
In a multi-tenant/partner console, there are two types of admin users:
- Global Admin: User who can manage all settings for all sites/customers.
- Site/Customer Admin: User who has access only to specific sites/customers.
It is not possible to be a viewer at global level, only at site/customer level.
Inviting Users to Business Hub
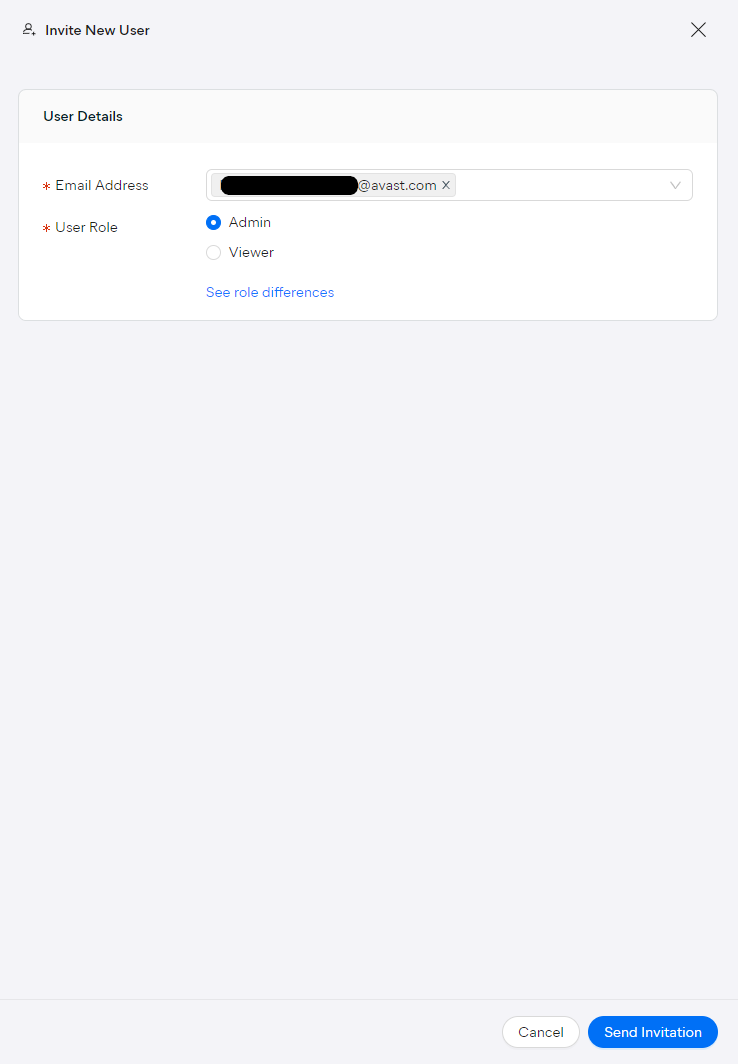
To invite a user to manage/view
- Go to the Users page
- Click the + User button in the top right corner
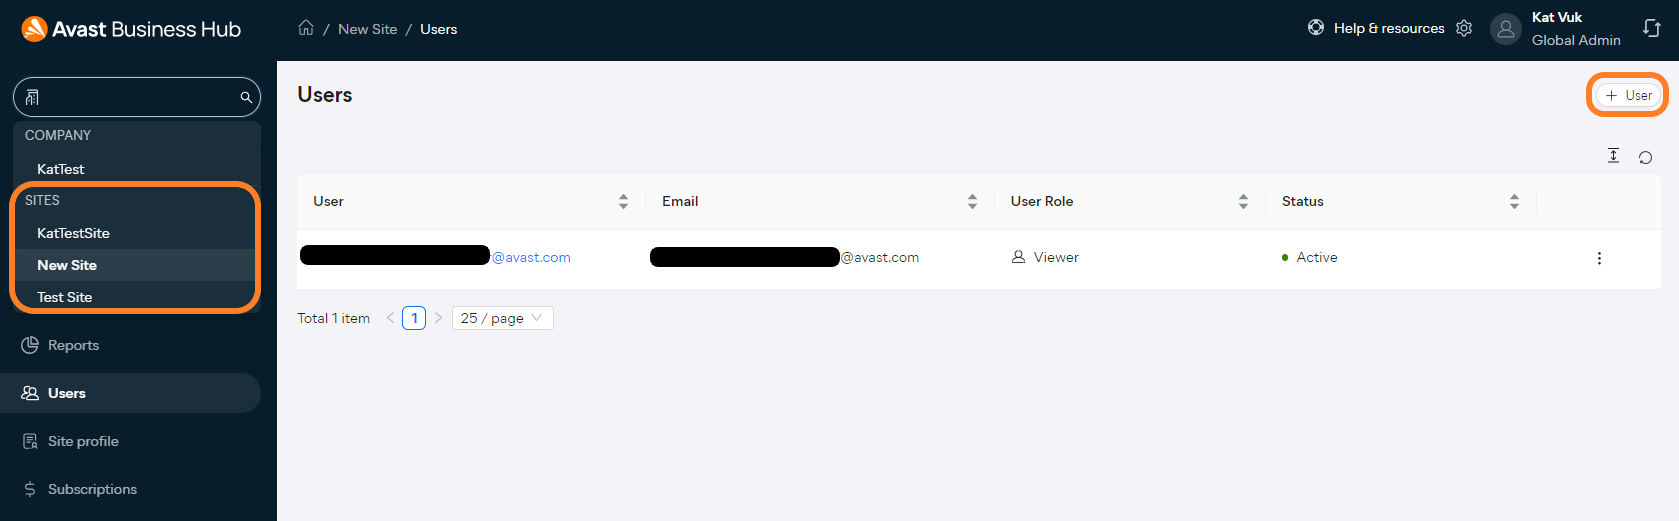
- Type in the new user's email address, then press Enter
- Choose either the Admin or the Viewer role for the user
- Click Send Invitation
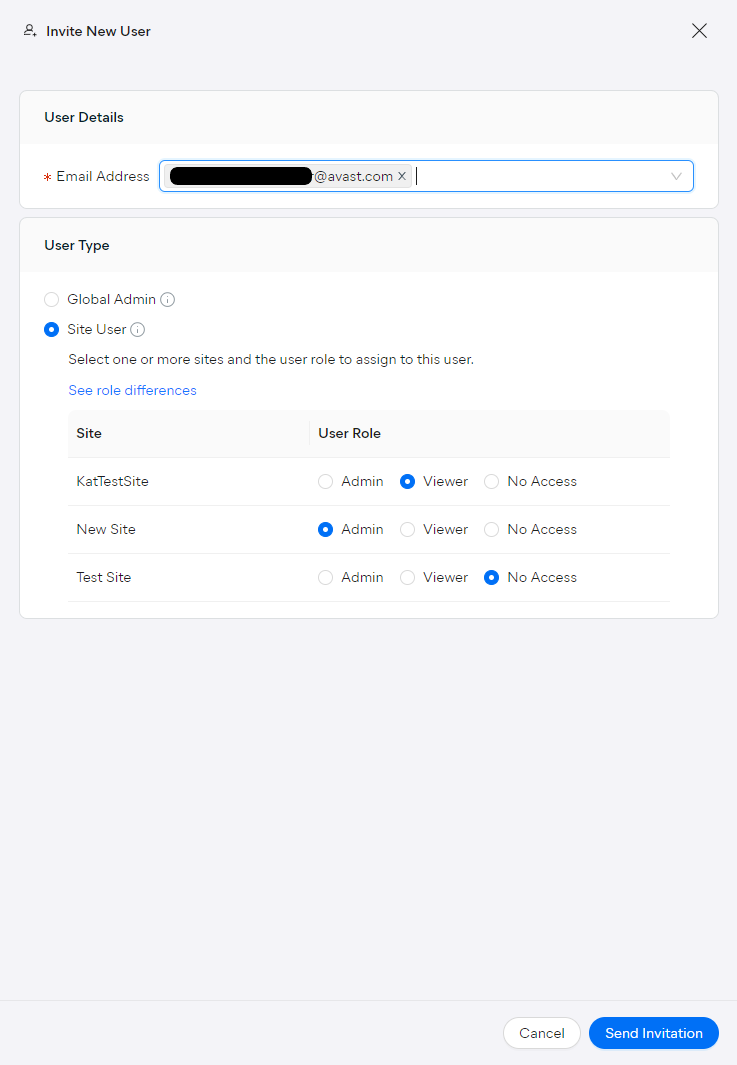
To invite a user to manage/view multiple or all sites/customers in a multi-tenant/partner Business Hub:
- Go to the parent-level Users page
- Click the + User button in the top right corner
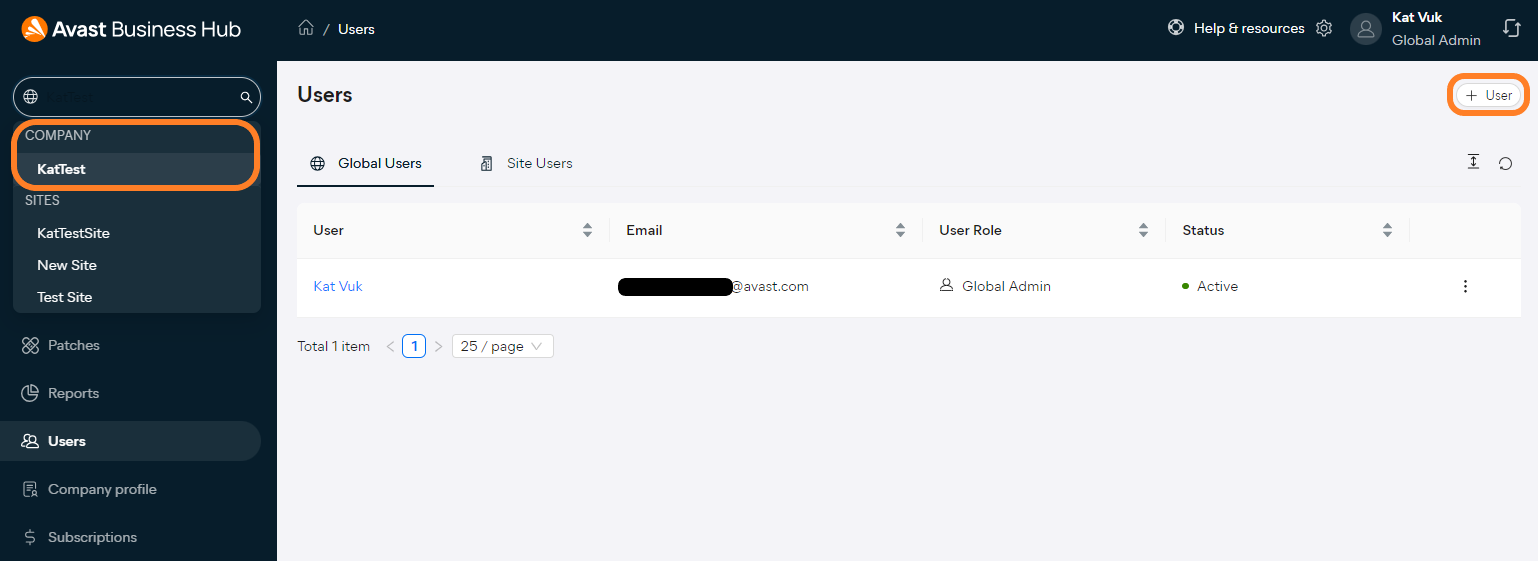
- Type in the new user's email address, then press Enter
- Do one of the following:
- Select Global Admin to enable the user to manage all sites/customers
- Select Site/Cutomer User to enable the user to manage or view only certain sites/customers, then choose between Admin and Viewer next to those sites/customers
- Click Send Invitation
The newly added user will be displayed on the Users page with the Invited status.

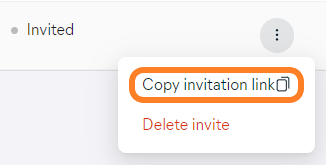
In cases where the email may not have arrived, you can use the Copy invitation link feature in the actions menu (three dots) to provide the link directly to the user.
Once the user accepts the invitation and logs in to the Business Hub for the first time, their status will switch to Active.

Accepting Invitations
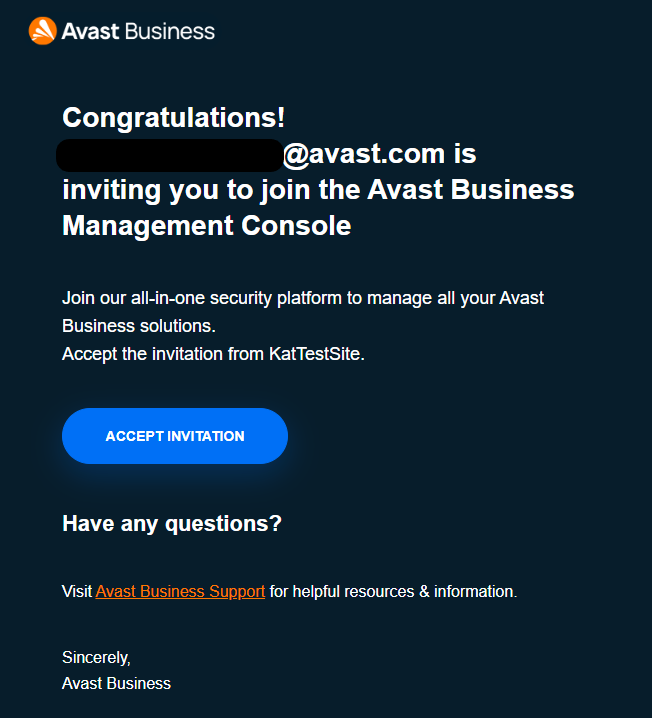
The new user must complete a few steps after receiving the email invitation. The process requires the user to:
- Click the Accept Invitation button in the email and wait until the Avast Business Hub login page opens in the browser
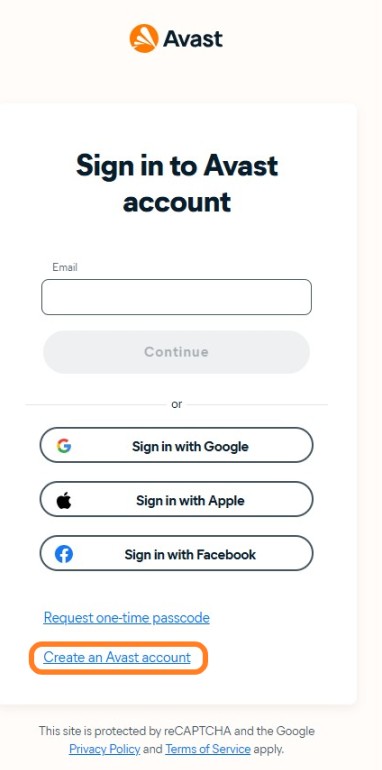
- Once the login page opens:
- If you already have an Avast account with that same email, you can simply log in and disregard the remaining steps below
- If you don't have an Avast account with that email, you must select Create an Avast Account and follow the remaining steps below
- If you already have an Avast account with that same email, you can simply log in and disregard the remaining steps below
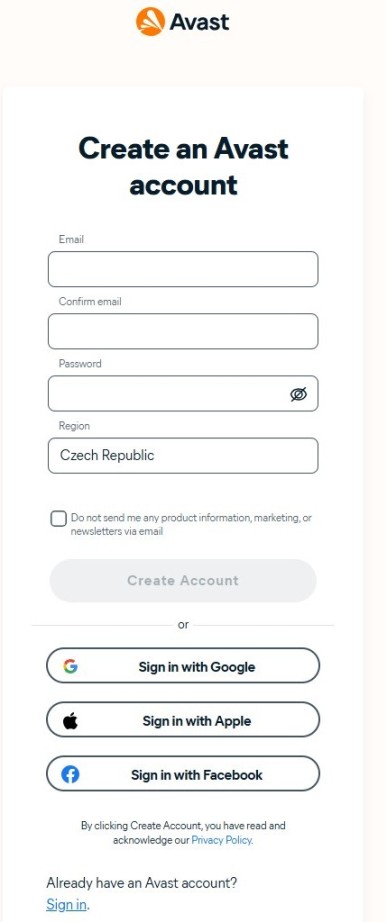
- Enter the email address to which the invite was sent, choose your Hub password, select your country, then click Create Account
- Enter the one-time passcode sent to the email address you specified
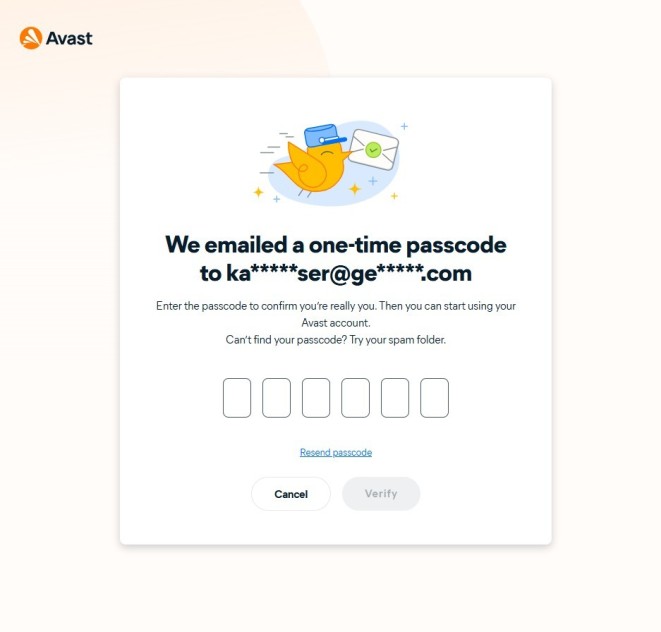
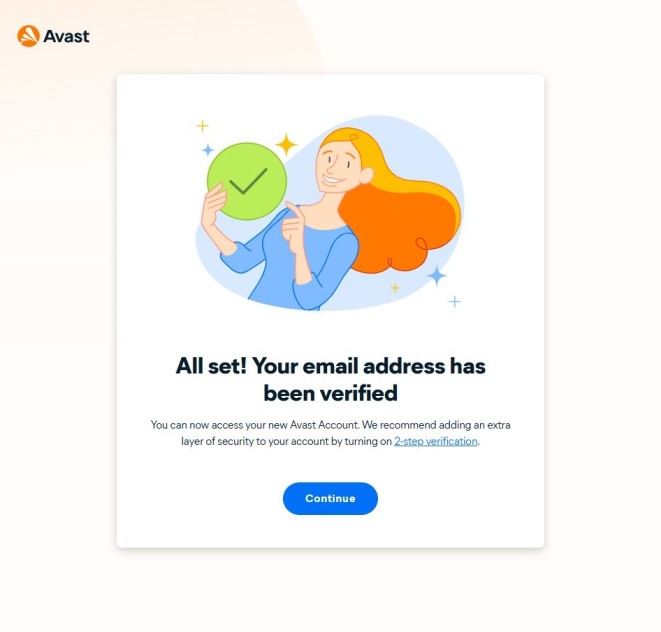
- Click Continue to access the console.
Deleting Invitations
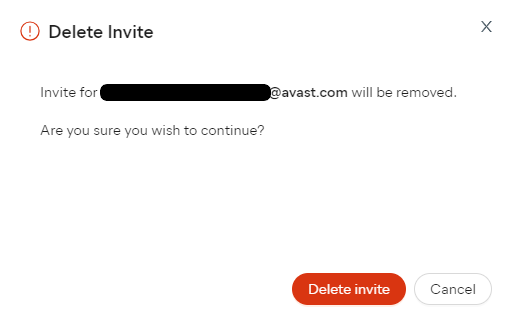
If needed, you can cancel your invitation while the user's status is still Invited. Simply click the three dots next to the user to open the actions menu and select Delete invite.

Then, confirm the action by selecting Delete invite in the pop-up dialog.
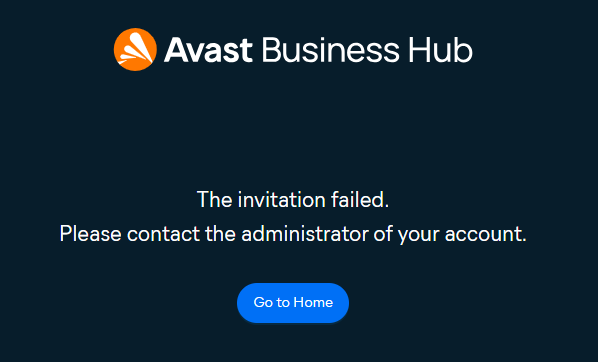
Once the invitation has been deleted, clicking the Accept Invitation button in the previously sent email invitation will display the The invitation failed. Please contact the administrator of your account message in the browser.
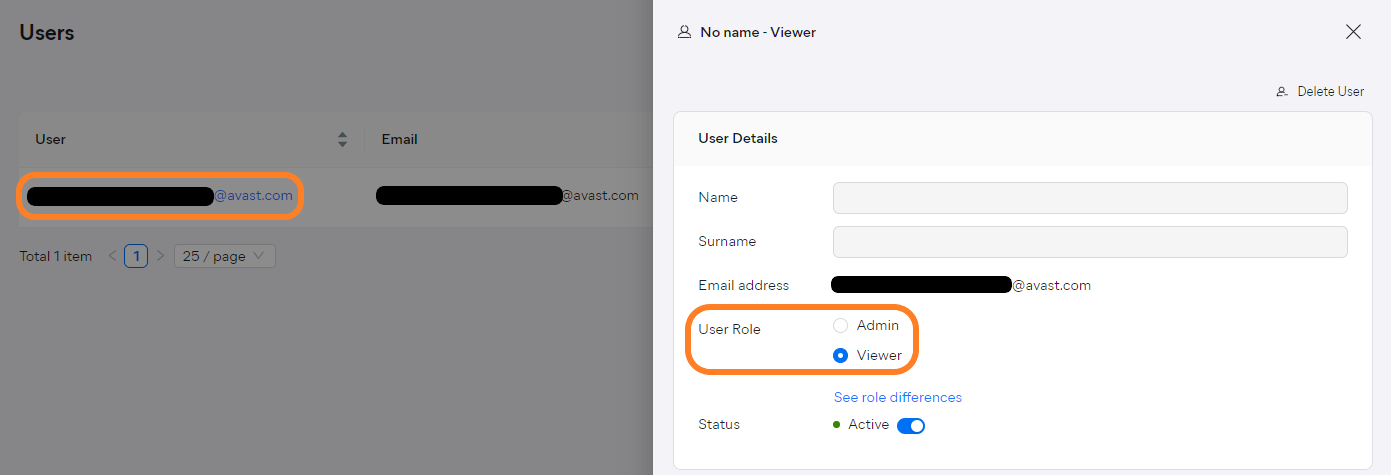
Changing User Roles
If you need to change a user's role
- Go to the Users page
- Click the user's username to open their Detail drawer
- Select the new role (Admin or Viewer)
- Save your changes
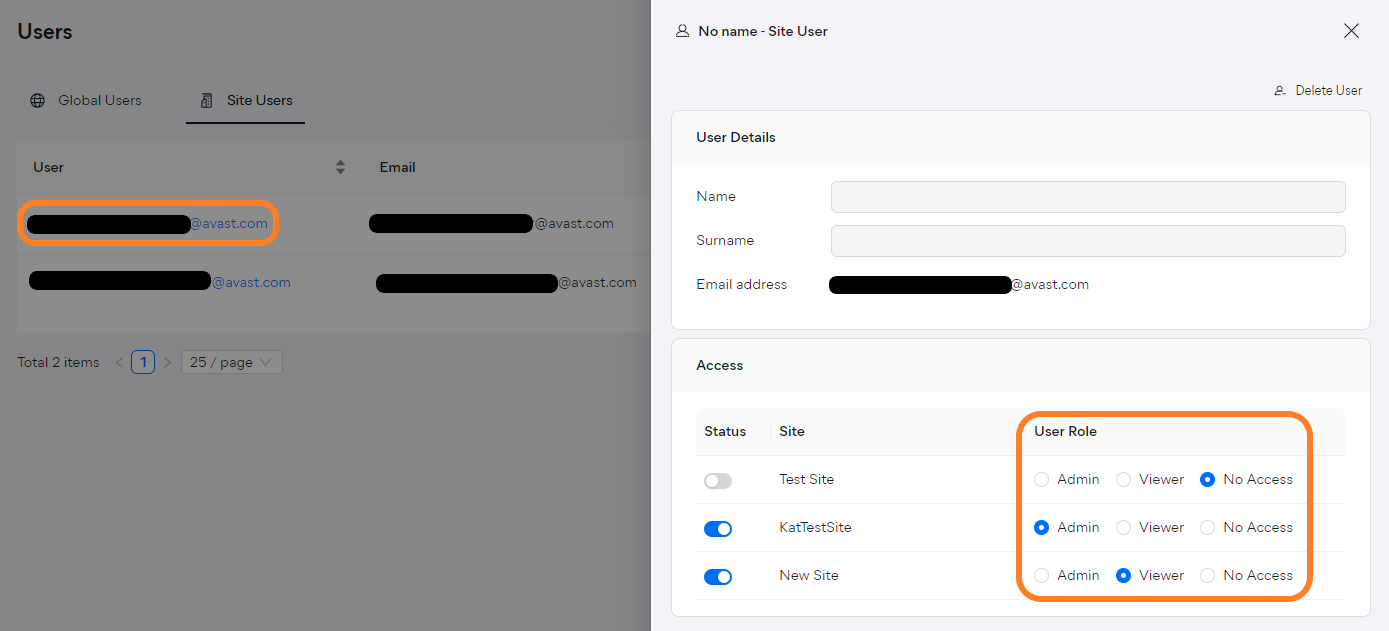
To change a user's role for multiple sites/customers in a multi-tenant/partner console:
- Go to the parent-level Users page
- Select the Site Users tab
- Click the user's username to open their Detail drawer
- Next to the desired sites/customers, select the new role (Admin, Viewer, or No Access)
- Selecting No Access will revoke the user's access to the selected site(s) completely.
- Save your changes
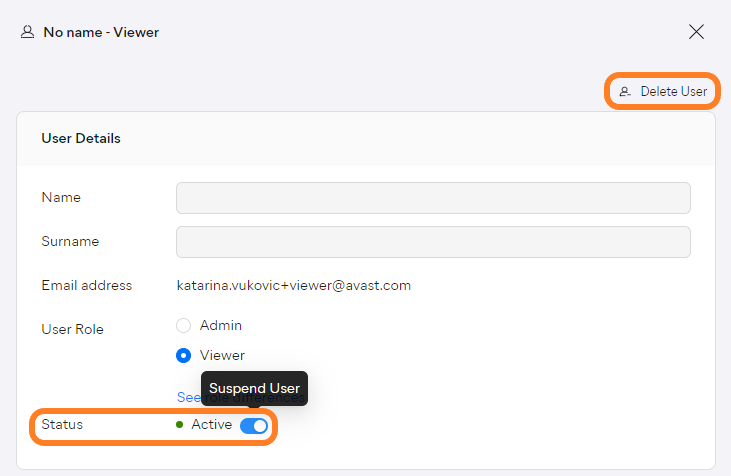
Suspending or Deleting Users
To suspend or delete a user
- Go to the Users page
- Click the three dots next to the user you want to suspend/delete to open the actions menu
- Select Suspend User/Delete User
- Note that in a multi-tenant/partner console, deleting/suspending a user at site/customer level will only affect their permissions for that particular site/customer.

- In the confirmation prompt, select Suspend user/Delete user again

These actions can also be performed from the user's Detail drawer.
If, however, you would like to remove or suspend the user's access to multiple or all sites/customers, the easiest way would be via the parent-level Users page. You can again use the actions menu or the available options in the user's Detail drawer.
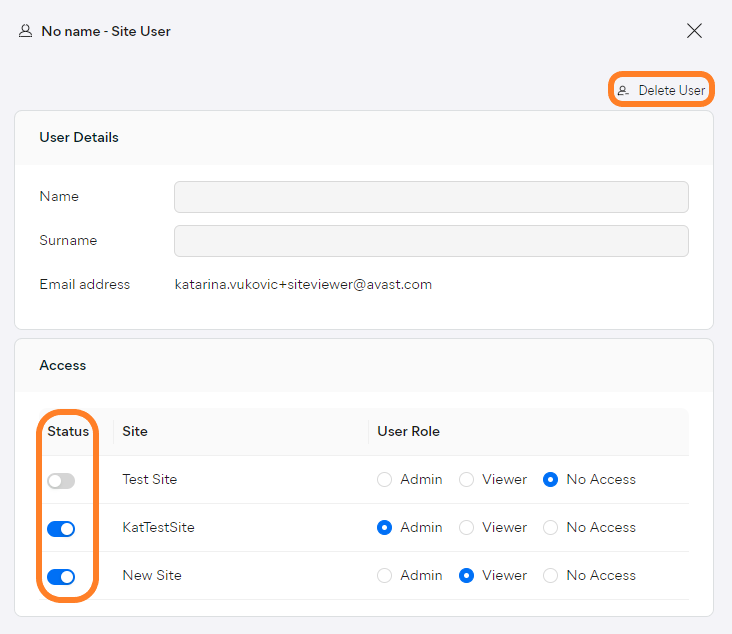
Deleted users will be removed from the list, while suspended users will remain listed with the Suspended status and can be reactivated anytime via the Activate User option in their actions menu.

Editing User Account Settings
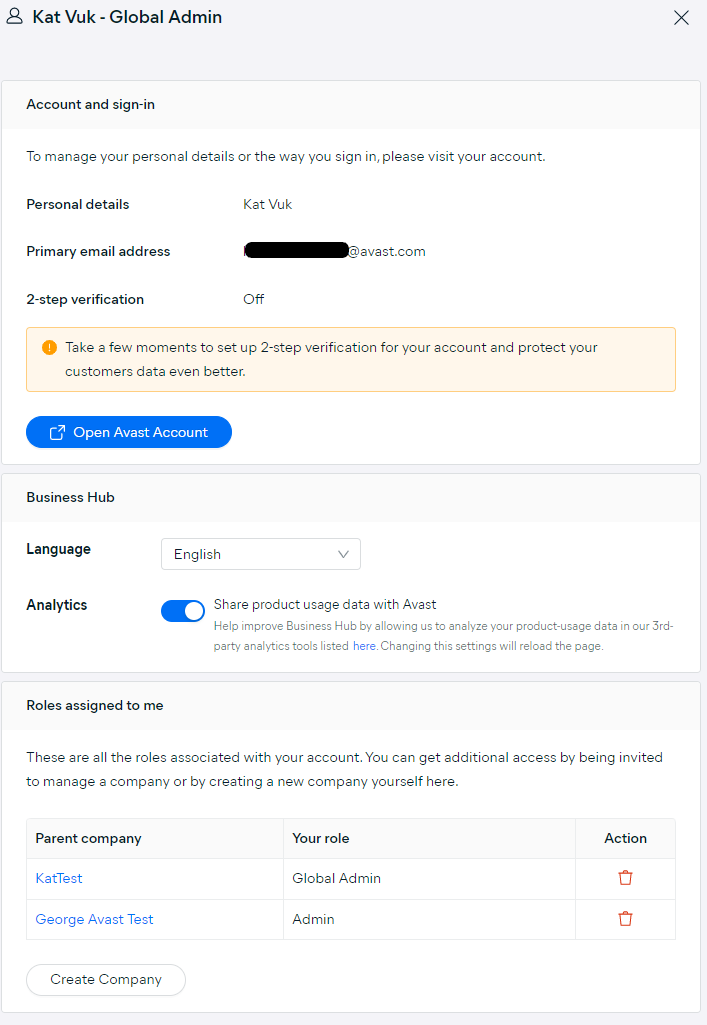
Editing other users' personal details or other settings related to their accounts (e.g. login password) is not possible. Each user can access and modify only their own account settings.
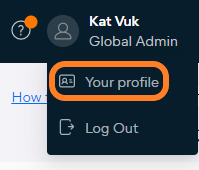
The Your profile section of the Business Hub, accessible via the drop-down menu in the console's top right corner, provides a quick way for the console users to access their Avast account to alter their personal details.
Additionally, users can perform the following account-related actions:
- Change the language used by the console
- Choose whether product usage data is shared with Avast
- View/remove assigned roles
- Create new companies
For more information, see